
Lean-to greenhouse guide
Lean-to greenhouse buying guide
Choose a lean-to greenhouse by comparing wall suitability, exact footprint, back design, doors, glazing, ventilation, base and rainwater details.
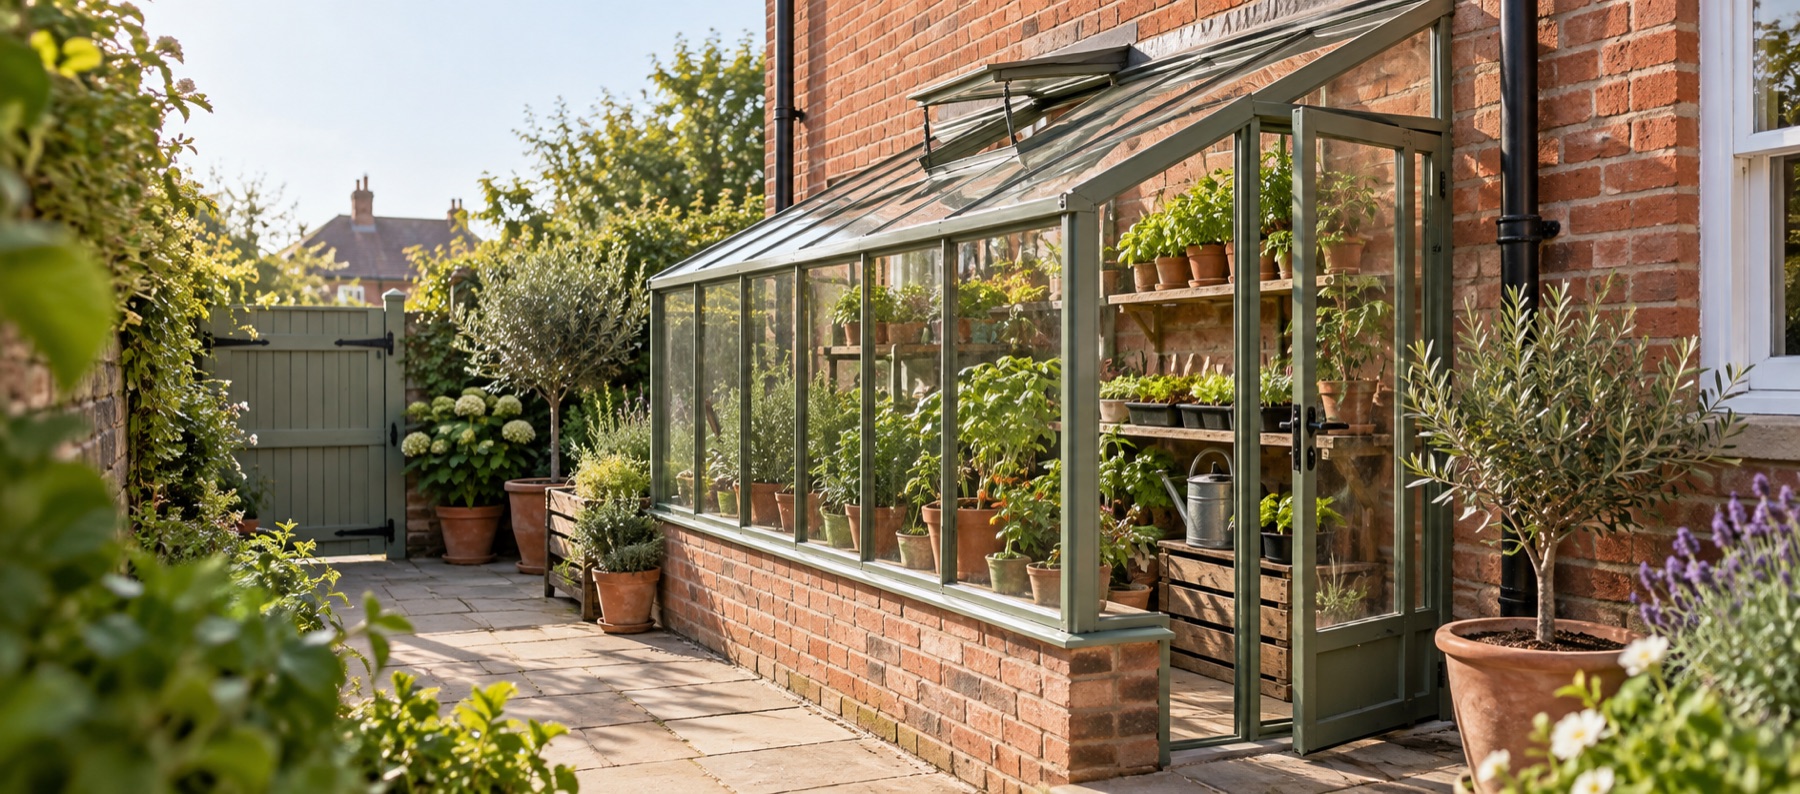
Our recommendations
Lean-to and wall greenhouse options
These three formats range from a compact walk-in to a long aluminium lean-to and a shallow tall-wall growing cabinet.

Forest Wallscape 4 × 4 lean-to greenhouse
Best for: a compact timber lean-to
A timber walk-in lean-to with a 1.18 × 1.24m base, acrylic glazing, single door and large opening roof vent. Its open back is designed to sit against a suitable wall or fence.
What stands out
- Walk-in space within a short footprint
- Large opening roof vent
- Door can be fitted at either end
Keep in mind
- Needs a suitable supporting surface
- No floor is included
- 1.18 × 1.24m base
- pressure-treated timber
- acrylic glazing
- open back
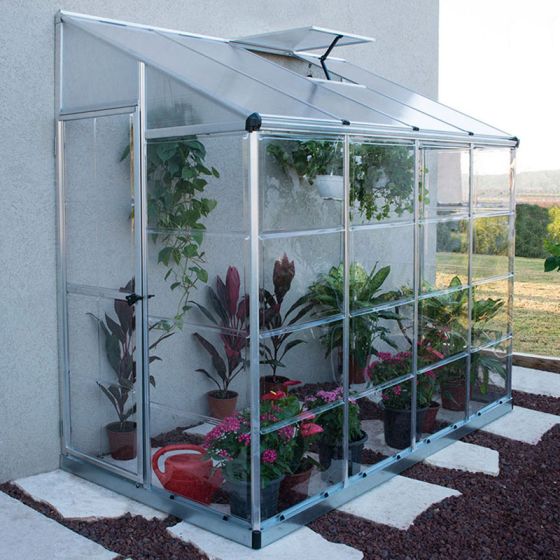
Palram Hybrid Lean-To 8 × 4 greenhouse
Best for: a long, narrow wall-side plot
A long, shallow walk-in lean-to with a side door, diffusing twin-wall roof and clear side panels. It turns roughly 1.25m of projection into a useful 2.44m run against a suitable wall.
What stands out
- Makes use of wall length
- Side door suits the narrow layout
- Perimeter base and wall kit included
Keep in mind
- Needs a suitable wall
- 1.21m width limits two-sided staging
- 2.44 × 1.25m overall
- lean-to
- polycarbonate
- wall-mount kit

Forest Victorian 5 × 2 tall wall greenhouse
Best for: vertical growing space on a shallow patio
A 1.47 × 0.72m tall timber greenhouse with a back panel, double doors, adjustable shelving, two roof vents and one automatic vent opener. It uses height rather than garden depth.
What stands out
- Shallow footprint with full-height storage
- Adjustable and folding shelves
- One automatic vent opener included
Keep in mind
- Not walk-in
- Supplied unpainted
- 1.47 × 0.72m base
- pressure-treated timber
- styrene glazing
- two roof vents
| Option | Base or overall size | Back design | Glazing | Access and vents |
|---|---|---|---|---|
| Forest Wallscape 4 × 4 | 1.18 × 1.24m base | Open back | Acrylic | Single door; large roof vent |
| Palram Hybrid Lean-To 8 × 4 | 2.44 × 1.25m overall | Wall-mounted walk-in | Polycarbonate | Side door; roof vent |
| Forest Victorian 5 × 2 | 1.47 × 0.72m base | Back panel included | Styrene | Double doors; two roof vents |
What counts as a lean-to greenhouse?
A lean-to has a single sloping roof and is designed to use a wall-side position. Some models are genuinely open-backed and rely on the existing wall to close the growing space. Others have their own rear panels but still require wall mounting. Tall wall greenhouses may simply stand against a wall with a complete back.
That distinction affects weather sealing, fixings, heat, installation time and where the model can be used. Read the product drawing and assembly instructions rather than assuming every structure described as “wall” or “lean-to” installs in the same way.
When a lean-to is the right format
Lean-tos are particularly effective in side returns, patios and courtyards where wall length is available but a freestanding apex structure would consume too much depth. The wall can shelter one side and place the greenhouse conveniently close to the house or water source.
They are less suitable when the only wall is heavily shaded, uneven, covered by services or difficult to drill safely. A long structure can also block windows, vents or maintenance access that seemed unimportant when the site was empty.
Measure the wall and the projection
Start with the published base and overall dimensions. Mark the full run along the wall and the furthest projection into the path or patio. Add guttering, roof overhangs, door movement and the space needed to clean the outer glazing.
Then measure vertically. Check window sills, external lights, boiler flues, air bricks, overflow pipes, eaves and cable routes. No greenhouse should obstruct ventilation, drainage or access to building services. If the wall is not plumb or the paving is not level, find out how the manufacturer expects the gaps and base to be handled before buying.
Check the supporting surface
Brick, block, timber and rendered walls require different fixings and care. Confirm that the wall belongs to you, is sound and can accept the specified anchors. Investigate hidden pipes and cables before drilling. Render, cladding and external insulation systems can require specialist advice because the visible surface may not provide structural support.
An open-backed timber design needs a clean relationship with the wall to limit gaps. A glazed aluminium lean-to may include a wall-mounting profile or kit, but that does not guarantee compatibility with every wall construction.
Open back, solid back or glazed back
An open back saves material and can expose a warm masonry wall inside the greenhouse. It requires a suitable surface and careful detailing at the edges.
A solid back makes the structure less dependent on the appearance of the wall and can suit a fence-side position when the manufacturer permits it. It also reduces light from that direction.
A glazed back creates a more complete enclosure and can allow alternative positions, but it increases panel area and may leave a narrow cleaning gap if pushed close to a wall. The best choice depends on whether the building surface is structural, attractive, light-reflective and accessible.
Door position makes the layout
Long, shallow greenhouses work best when entry does not consume the central growing run. A side or end door can be ideal, but only if the approach remains open. Check whether the door can be hung at either end and whether it slides or swings.
For a 4 × 4 walk-in, sketch the aisle and staging before ordering. The exterior can fit a courtyard while the internal door and shelf arrangement still feel tight. For an 8 × 4 lean-to, consider where a long tray or growbag will go without blocking the only route.
Glazing and ventilation
Polycarbonate keeps weight manageable and is common in aluminium wall greenhouses. Acrylic and styrene glazing are used on timber growhouses. Whatever the material, inspect how panels are retained and how replacement panels would be fitted next to the wall.
Warm wall-side sites can heat quickly. A roof vent is valuable because hot air rises toward the high wall edge, but cooler replacement air still needs a route in. Door opening, low vents and automatic roof-vent control should be planned as one system. Avoid placing tall plants directly beneath the only vent.
Base, drainage and rainwater
The foundation must be level across both the wall and projection. Paving can be a practical patio solution when it is flat and capable of accepting the approved anchors. Timber models supplied without floors still need continuous stable support.
Rainwater from the house and greenhouse roofs needs a deliberate route. Check downpipes and gutter outlets before installation, not after the structure creates an inaccessible corner. Water should not be trapped against the house or greenhouse base.
Which option suits which space?
The Forest Wallscape 4 × 4 is the compact walk-in choice. Its open back and flexible end-door position make good use of a small courtyard, provided the supporting surface and foundation are suitable.
The Palram Hybrid Lean-To 8 × 4 suits a longer wall and turns shallow projection into a substantial growing run. Its included wall kit and perimeter base help define the system, but the wall and foundation still need proper assessment.
The Forest Victorian 5 × 2 is better understood as a tall growing cabinet. It has a back panel, adjustable shelving, double doors and two vents, so it suits propagation and containers where there is not enough depth for a walk-in aisle.
For more small-space formats, compare our mini greenhouse buying guide and best greenhouses for patios. For groundworks, use the bases and installation hub.
Obtain the exact wall-side model's instructions before planning fixings. The Halls assembly library provides model-specific examples; a cabinet, an open-backed growhouse and a structural lean-to do not share one universal installation detail.
Common questions
Frequently asked questions
Does a lean-to greenhouse have to be fixed to a wall?
Most true lean-to designs require a suitable supporting wall or structural fixing surface. Some tall wall greenhouses include a complete back panel and can be positioned against a wall without relying on an open back, so check the exact construction rather than the product name alone.
Which direction should a lean-to greenhouse face?
Light, shade, wind, wall material and summer heat all matter. A bright south-facing wall can warm quickly but may need strong ventilation and shade, while a deeply shaded north-facing wall may limit growth. Assess the actual site through the day.
Can I fix a lean-to greenhouse to a fence?
Only if the product instructions allow it and the fence is structurally suitable for the loads and fixings. Many ordinary boundary fences are not designed to anchor a glazed building, so independent support or a different model may be safer.
Do lean-to greenhouses need a base?
Yes. They need a firm, level foundation and correct anchoring just like freestanding greenhouses. Wall fixing cannot compensate for an uneven base.
Is a lean-to greenhouse warmer than a freestanding greenhouse?
A masonry wall can absorb and release heat, but the effect varies with aspect, construction and weather. Do not rely on the wall for frost protection; monitor temperature and plan ventilation and insulation for the crops being grown.