
Seed-starting guide
How to start seeds in a greenhouse
Learn when to sow seeds under glass in the UK, how to manage germination heat, light, watering and ventilation, and when seedlings can safely move on.
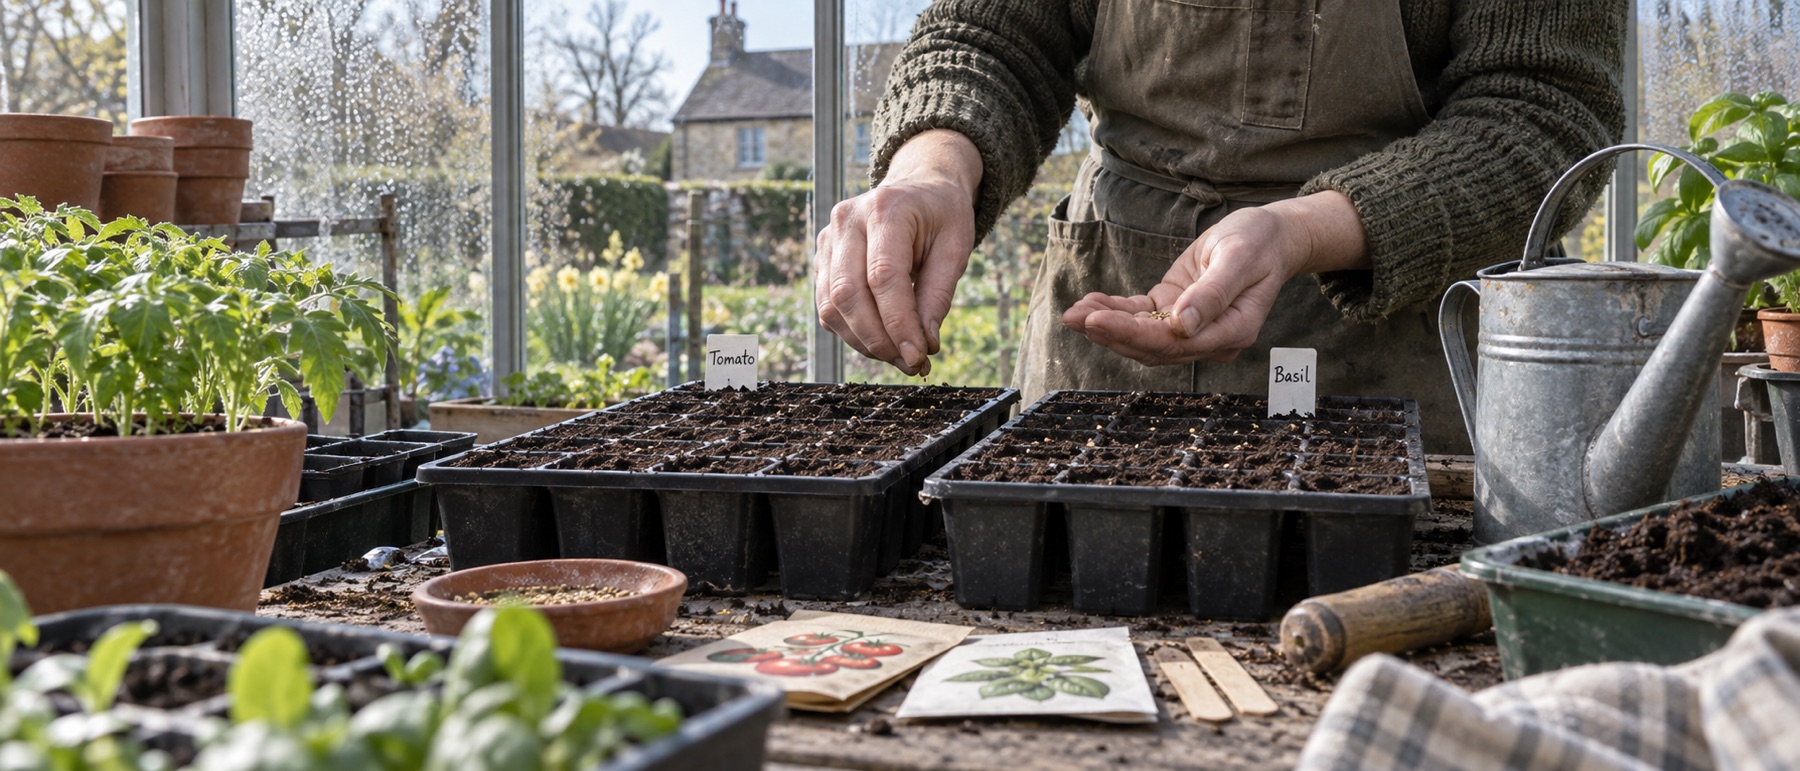
Check the coldest overnight temperature, not just the sunny daytime reading.
A heated propagator warms a small sowing zone; it does not heat an unheated greenhouse.
Remove or vent covers promptly after emergence to reduce damp, weak growth.
Plan the destination of every tray before sowing it.
The first decision is timing, not equipment
The most common greenhouse seed-starting mistake is sowing as soon as the first bright day makes the glazing feel warm. Sun can lift the air temperature quickly, while the same structure falls close to outdoor temperature overnight. If seedlings emerge into cold, low-light conditions, early sowing can produce weaker plants than a later, better-timed batch.
Read the seed packet for sowing window, depth and germination temperature. Work backwards from the date a crop can safely enter its final position, including the weeks it needs in a pot after germination. Our UK greenhouse growing calendar gives the broad seasonal sequence; it is not a substitute for the packet or your local weather.
Choose seeds for the space you really have
Tomatoes, cucumbers and peppers are tempting to start in quantity, but each summer plant will eventually need a large pot, growbag position or border space. A 6 × 4 greenhouse can hold many modules in March and only a few mature cordons in July. Count final positions first, then add a small allowance for losses.
Fast-growing outdoor vegetables can use the greenhouse as a temporary nursery before planting out. Hardy lettuce and other salads may use a cool protected position for much longer. Keep these different jobs separate: a heated germination tray is not the right permanent climate for every seedling beside it.
Prepare clean trays and fresh compost
Use clean modules or pots with drainage holes, fresh peat-free seed or multipurpose compost and legible labels. Break up large lumps, fill evenly and firm gently rather than compacting the medium. Pre-moisten if it is very dry. Fine seeds and large seeds need different coverings; the seed packet takes priority.
Label each variety at sowing, not after the trays look identical. Include a sowing date on a removable label for your own record, even though the article does not depend on any fixed calendar date. A simple notebook of variety, temperature and emergence tells you more next season than buying more kit.
Keep new sowings away from trays with suspected pests or disease. Wash reused trays and tools, remove old compost and clear the bench before starting. The greenhouse hygiene guide explains a workable clean-to-dirty routine.
Provide the right germination environment
Many common seeds germinate well in moderate warmth, but there is no universal greenhouse setting. The RHS notes that roughly 18°C suits many indoor-sown seeds while individual packet instructions remain decisive. A bright windowsill indoors may meet that need. A heated propagator can provide more consistent warmth at the compost level if the greenhouse air is cool.
Place the propagator on a sound, level, dry bench with a supply suitable for the location. Keep plugs and connections away from water and follow the maker's electrical and ventilation instructions. In severe cold, a small heated base may not reach its intended temperature inside an unheated greenhouse; check the compost environment rather than assuming the dial tells the whole story. See our heated propagator comparison for footprint and control differences.
The cover conserves moisture, but excess condensation and stale air need attention. Check trays every day. Open the vents as seedlings appear and move them into adequate light. Do not leave newly emerged seedlings in a warm, dim, sealed dome merely because more seeds in the tray have not yet germinated; separate or stagger batches when necessary.
Light and temperature after emergence
Seedlings need light to build sturdy stems. A greenhouse bench with unobstructed light is useful, but low winter sun, shading by shelves and persistent cloud still matter. Rotate trays if they lean and remove any unnecessary opaque cover. If light is poor, delaying a sowing is often simpler than nursing leggy plants for weeks.
Measure overnight conditions with a max/min thermometer. One warm afternoon is not evidence that frost-sensitive plants can remain under glass. Protect tender young plants in a frost-free area until the greenhouse is consistently appropriate for that crop. Our frost-protection guide helps distinguish monitoring from heating.
Open a vent on mild days to exchange damp air, but do not create a cold draught straight across tiny seedlings. Balance temperature, light and airflow as a system. Sudden scorching is possible when a clear propagator lid sits in direct strong sun, even on a cool day.
Water without washing seeds away
Keep the compost moist enough for germination, not permanently saturated. A fine rose, hand mister used gently or bottom watering can avoid dislodging seeds. Drain excess water so pots are not standing in a deep tray. Check the centre and edge modules separately: edge cells often dry faster.
After emergence, water as the compost begins to need it. Avoid watering every morning automatically. Wet foliage overnight and crowded, stagnant trays increase disease risk. If stems collapse at the compost surface, remove affected plants and review cleanliness, density, moisture and airflow; see the wider propagation guide.
Prick out, pot on and harden off
Once seedlings are large enough to handle and have developed suitable leaves, move them into individual modules or pots with a growing medium appropriate to the crop. Handle by a leaf rather than crushing the stem, keep roots from drying during the operation, and water them in gently. Give them light and a suitable temperature to recover.
Pot on before roots circle tightly or the plants become starved. Tender crops destined for the greenhouse need a measured, frost-safe final position; outdoor crops need gradual hardening off before planting out. Do not put a newly pricked-out seedling straight into intense sun or a freezing night.
Common failures and their likely causes
No emergence can mean old seed, incorrect depth, wrong temperature or compost that dried out or stayed waterlogged. Patchy emergence can reveal cold corners on a bench. Long pale stems point first to a light-and-heat mismatch. Sudden collapse at soil level suggests damping-off or other root/stem trouble, not simply a need for more water.
Change one variable at a time and compare with a small fresh sowing. Good records prevent repeated guesses. When a crop has special needs, consult its own cultivation guidance; our greenhouse tomato guide is the next step for the most popular summer example.
Sources and related reading
The RHS guide to sowing seeds indoors covers compost, temperature and seedling care. Its vegetables-in-greenhouses advice distinguishes germination warmth from the conditions needed to grow plants on.
Helpful products
A controlled start for a bigger sowing run
The adjustable Garland unit is useful when several trays genuinely need warmth. A max/min thermometer helps show whether the surrounding greenhouse is safe for seedlings after germination.
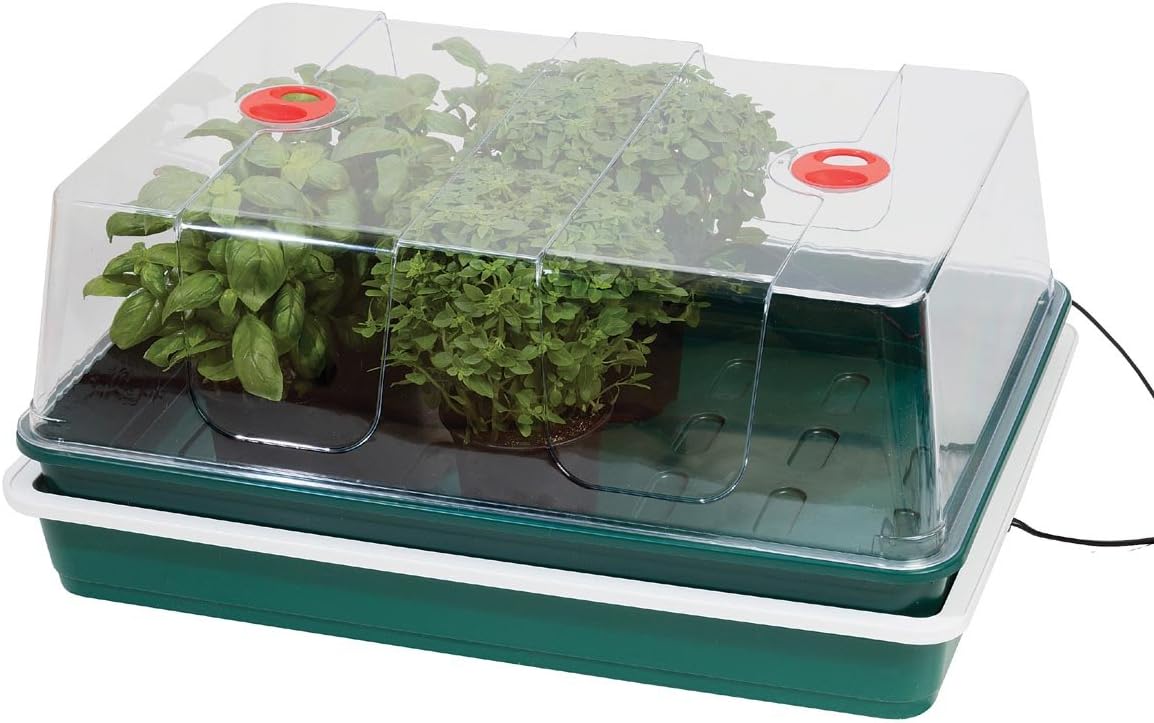
Garland 50W variable-temperature electric propagator
Best for: adjustable heat for several trays
A broad heated base with a tall clear dome and adjustable temperature control. Its listed 59 × 41cm footprint gives room for several seed trays, provided there is a safe supply and enough light.
What stands out
- Useful tray capacity
- Adjustable control
- Tall lid gives seedlings headroom
Keep in mind
- Wide bench footprint
- Warm base does not heat the whole greenhouse
- 59 × 41 × 27cm listed size
- 50W
- adjustable temperature control
- tall clear dome

Brannan Quickset digital max/min greenhouse thermometer
Best for: easy daily max/min checks
A wall-mounted digital thermometer with current, maximum and minimum readings and a one-button reset. The published measuring range is −20°C to 50°C with ±1°C stated accuracy.
What stands out
- Large separate readings
- One-button reset
- Wall-mounted greenhouse format
Keep in mind
- No humidity reading
- No remote alerts or history graph
- −20°C to 50°C range
- ±1°C stated accuracy
- max/min memory
- AAA battery included
Common questions
Frequently asked questions
Can I sow seeds in an unheated greenhouse in February?
Hardy crops may be possible, but many tender seeds need more warmth than an unheated UK greenhouse can reliably provide. Use the packet's temperature advice and a protected indoor or heated propagator position, then plan where the seedlings will grow on.
Do all seeds need a heated propagator?
No. Germination temperatures vary by crop and variety. A bright indoor windowsill or sheltered greenhouse tray can suit some seeds, while tomatoes, peppers and other tender crops often benefit from controlled warmth early in the year.
Should I keep the propagator lid on after germination?
Open vents and remove the lid as seedlings emerge, following the unit and seed guidance. Prolonged warm, saturated air encourages weak growth and damping-off problems.
When can seedlings move into an unheated greenhouse?
When the crop can tolerate the measured overnight conditions and there is enough light. Tender seedlings may still need frost-free protection or a later move even when daytime greenhouse temperatures feel warm.
How often should I water seed trays?
Check the compost rather than watering by a fixed calendar. Keep it evenly moist but not waterlogged; use a gentle rose or water from below where suitable so seeds and young roots are not displaced.