
Positioning guide
Where to position a greenhouse
Find the best greenhouse position by assessing sun, shade, wind, drainage, access, services, boundaries and the exact working footprint.
Our recommendations
Formats that solve different site constraints
Position and format are linked: a shallow lean-to, compact walkaround or conventional freestanding greenhouse needs a different working zone.
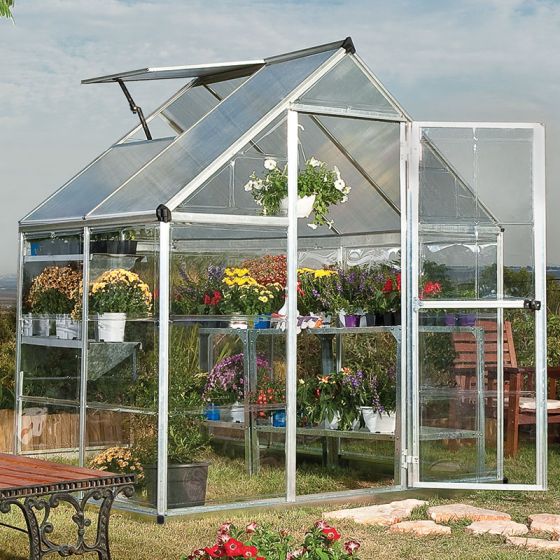
Palram Canopia Hybrid 6 × 4 greenhouse
Best for: a compact first walk-in greenhouse
A compact walk-in with a 1.85 × 1.25m base, diffusing twin-wall roof panels and clear polycarbonate sides. It is the most balanced fit here for a small garden that can still keep a central path.
What stands out
- Compact walk-in footprint
- Clear sides and diffusing roof
- Steel perimeter base included
Keep in mind
- Single 565mm door
- One roof vent means summer airflow needs planning
- 1.85 × 1.25m base
- aluminium
- polycarbonate
- one roof vent
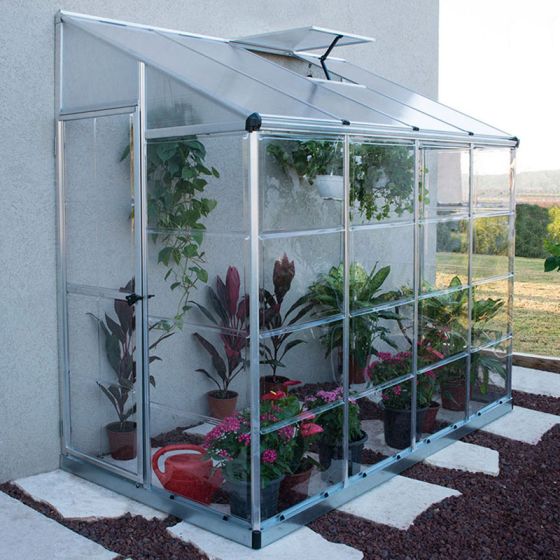
Palram Hybrid Lean-To 8 × 4 greenhouse
Best for: a long, narrow wall-side plot
A long, shallow walk-in lean-to with a side door, diffusing twin-wall roof and clear side panels. It turns roughly 1.25m of projection into a useful 2.44m run against a suitable wall.
What stands out
- Makes use of wall length
- Side door suits the narrow layout
- Perimeter base and wall kit included
Keep in mind
- Needs a suitable wall
- 1.21m width limits two-sided staging
- 2.44 × 1.25m overall
- lean-to
- polycarbonate
- wall-mount kit

Forest Victorian 3 × 4 walkaround greenhouse
Best for: compact timber growing with flexible access
A compact pressure-treated timber greenhouse with a 0.90 × 1.20m base, four configurable doors, removable staging and opening windows including one automatic vent. It gives access from several sides without needing a full internal aisle.
What stands out
- Access from several sides
- Removable staging and growbag space
- One automatic vent window included
Keep in mind
- Not a conventional walk-in
- Narrow individual door openings
- 0.90 × 1.20m base
- pressure-treated timber
- styrene glazing
- four configurable doors
| Format example | Published footprint | Site advantage | Positioning constraint |
|---|---|---|---|
| Palram Hybrid 6 × 4 | 1.85 × 1.25m base | Freestanding light and conventional aisle | Needs access around all sides |
| Palram Hybrid Lean-To 8 × 4 | 2.44 × 1.25m overall | Uses wall length and shallow projection | Needs suitable wall, fixings and drainage |
| Forest Victorian Walkaround 3 × 4 | 0.90 × 1.20m base | Plants reached from several sides | Needs clear access to the chosen doors |
Start with a garden survey
A greenhouse is difficult and expensive to move once its foundation is built. Spend several days observing the intended area before committing. Note morning, midday and evening sun; shadows from buildings and trees; the direction of strong wind; wet patches after rain; and the route you naturally use through the garden.
The brightest-looking summer corner may be shaded by a low winter sun. A sheltered winter site may become a heat trap in July. There is rarely a perfect position, so identify which compromise you can manage with vents, shade or a slightly different greenhouse format.
Light and seasonal shade
The RHS siting guidance recommends uninterrupted sun where possible, with protection from cold northerly or easterly winds. Open sky matters because winter light is weak and the sun remains low. Evergreen hedges, garages and neighbouring buildings can cast long shadows precisely when seedlings need the most light.
Deciduous trees create less winter shade but bring falling twigs, leaves, sap and bird mess. Keep clear of the crown and allow for future growth. If two sites are otherwise equal, choose the one with reliable morning light so condensation dries sooner and plants begin photosynthesising early.
Use a phone compass and take photos from the proposed position at several times of day. Repeat the check in a different season if the purchase is not urgent.
Wind and shelter
A hedge, open slatted fence or other porous screen can reduce wind without creating the abrupt turbulence caused by a solid barrier. Do not place the greenhouse hard against the sheltered side of a wall simply because that area feels calm at ground level; eddies can pull at roof vents and panels.
Look for wind funnels between buildings and gates. Securely anchor every greenhouse, even in a seemingly protected urban garden. On exposed plots, choose a model with a clear retention and anchoring system, and keep enough room to inspect every side before severe weather.
Drainage, ground and frost pockets
The foundation must remain stable and level. Avoid hollows where surface water collects or cold air settles. Wet clay may need excavation and a compacted sub-base; loose made ground may need specialist assessment before supporting a heavy structure.
Water should drain away from the greenhouse without being sent towards neighbours or the house. Roof gutters can feed a water butt, but overflow still needs a safe route. Do not block inspection covers or build over unknown services.
If the plot slopes, level the foundation rather than following the ground. Significant retaining structures and changes of level can add engineering and planning questions beyond the greenhouse itself.
Access around and inside
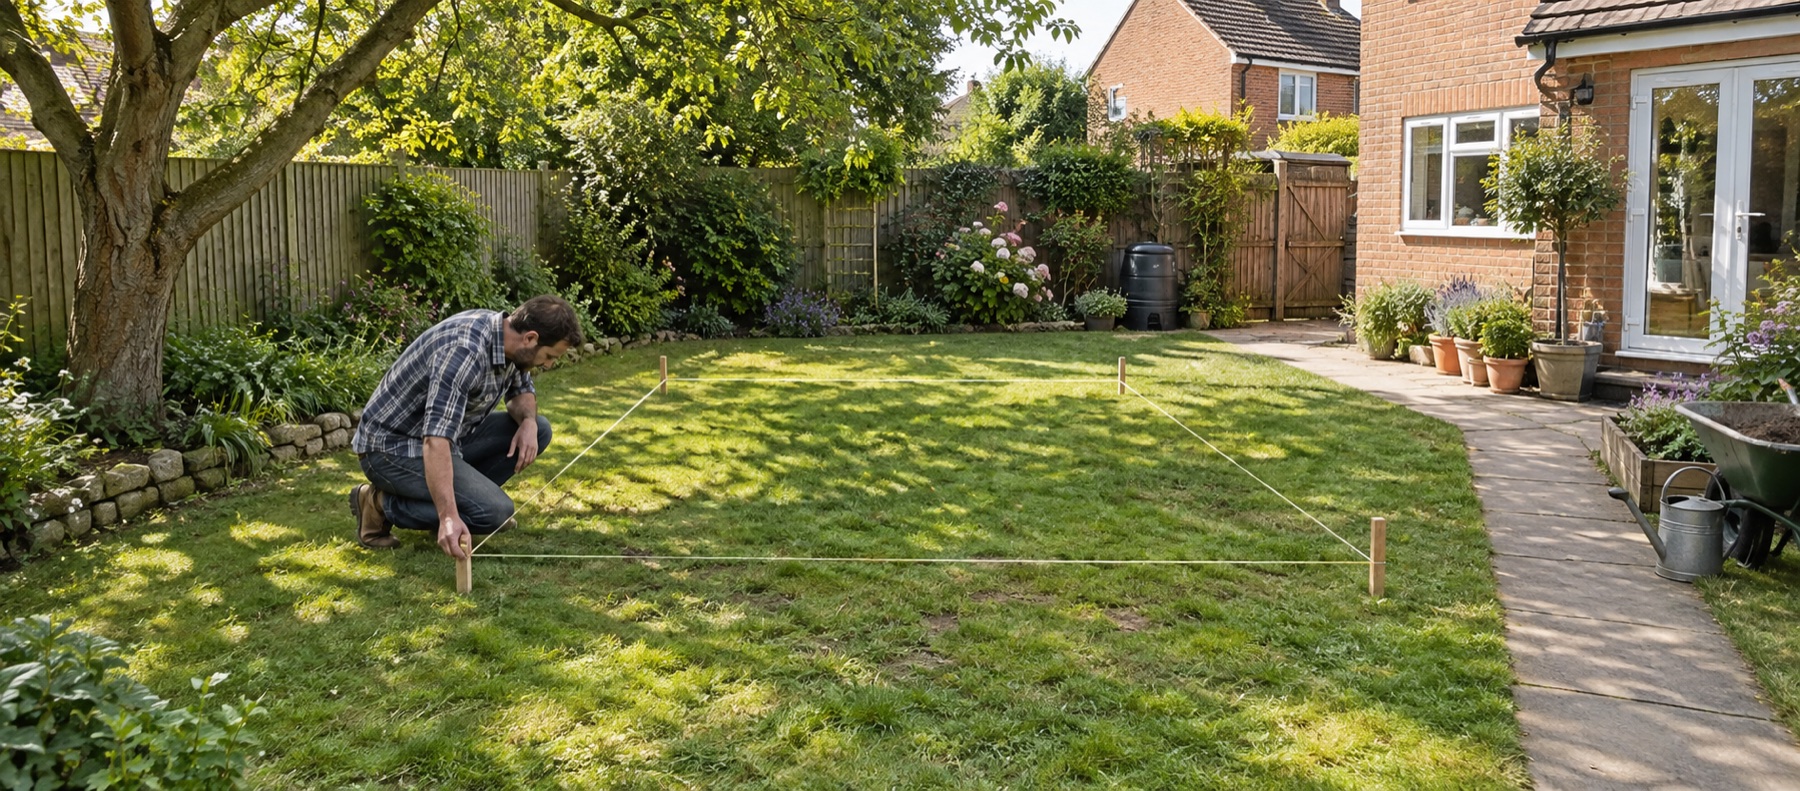
Mark the exact base dimensions with string, then add the door opening, path and exterior maintenance zone. A sliding door saves swing space; a hinged door needs a clear arc and a stop or catch. Wall-mounted and walkaround formats may need access on specific sides.
Plan the route for bags of compost, trays, large pots and a watering can. A narrow, muddy path will discourage everyday use. If step-free access matters, include the threshold and path gradient in the decision before choosing the model.
External access is equally important. Glazing has to be cleaned, clips replaced and gutters cleared. A greenhouse squeezed against a fence may technically fit but become impossible to maintain.
Water, electricity and daily convenience
Positioning near a safe water supply makes regular care easier. A water butt fed from greenhouse gutters provides useful stored rainwater, although it needs a stable base and overflow plan. Long hoses across paths create trip hazards and are easily damaged.
If power is planned for heating, propagation or monitoring, use an outdoor electrical installation designed and certified for the environment. Do not treat a domestic extension lead as a permanent greenhouse supply. Decide this before laying the base so cable routes are not improvised later.
A greenhouse visible from the kitchen or used path is more likely to be opened, watered and checked. Convenience can outweigh a small theoretical gain in sunlight if the remote site will be neglected.
Walls, fences and boundaries
A lean-to needs a sound, suitable wall and the correct fixing method. Check downpipes, vents, windows, eaves, damp-proof details and roof runoff. An open-backed timber lean-to depends on the wall as part of its enclosure; a glazed-back model may have different tolerances.
Boundary proximity affects construction access, neighbour relations and planning limits. It may also restrict how a door opens or how safely glazing can be handled. Read our greenhouse planning permission guide before fixing the final location.
Position before orientation
East–west and north–south ridge orientation affect seasonal light, but they are not more important than avoiding shade, branches, poor drainage or an inaccessible doorway. First select the best practical site; then rotate the greenhouse within that site if the footprint and path allow. Our UK greenhouse orientation guide explains the seasonal trade-off.
Final site checklist
Before laying a base, confirm open light, wind exposure, drainage, exact levels, door clearance, maintenance access, delivery route, services and planning status. Photograph the marked footprint and compare it with the manufacturer's technical drawing. A few hours spent testing the site prevents years of awkward access and avoidable shade.
For a site with nearby mature planting, use greenhouses near trees before digging. Then compare the clearance guide so the chosen position supports cleaning, repairs and door access as well as light.
Common questions
Frequently asked questions
Should a greenhouse be in full sun all day?
Open light is useful, especially in winter, but a workable site also needs ventilation and summer heat control. A little late-afternoon shade can be manageable; deep shade from buildings or evergreen trees is much harder to correct.
How far should a greenhouse be from a fence?
There is no single gardening distance. Leave enough room to assemble, clean and repair the chosen model, reach gutters and avoid trapped debris. Planning and boundary rules vary by UK nation and property, so check those separately.
Can a greenhouse go under a tree?
It is usually a poor position. Branches and falling debris can damage glazing, summer shade reduces light, roots complicate the base and leaves block gutters. A site beyond the canopy is safer and easier to maintain.
Can I put a greenhouse on a slope?
The greenhouse itself needs a level, square support. A sloping garden may require excavation, retaining work or a properly designed raised foundation, with drainage managed so water does not collect against the base.
Should a greenhouse be close to the house?
A convenient greenhouse is visited more often, so reasonable proximity helps with watering and ventilation. Keep enough separation for access, drainage and maintenance, and check planning limits or wall-fixing requirements for the exact position.