
Base and installation guide
Best greenhouse base
Compare paving slabs, concrete, perimeter foundations, timber and proprietary greenhouse bases, with practical advice on levelling, drainage and anchoring.
Our recommendations
How product design changes the base decision
An included perimeter base, optional base or floorless timber structure each needs a different connection to the prepared foundation.
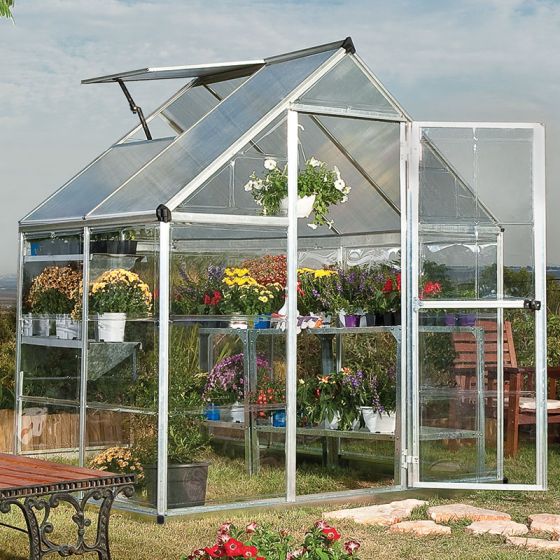
Palram Canopia Hybrid 6 × 4 greenhouse
Best for: a compact first walk-in greenhouse
A compact walk-in with a 1.85 × 1.25m base, diffusing twin-wall roof panels and clear polycarbonate sides. It is the most balanced fit here for a small garden that can still keep a central path.
What stands out
- Compact walk-in footprint
- Clear sides and diffusing roof
- Steel perimeter base included
Keep in mind
- Single 565mm door
- One roof vent means summer airflow needs planning
- 1.85 × 1.25m base
- aluminium
- polycarbonate
- one roof vent
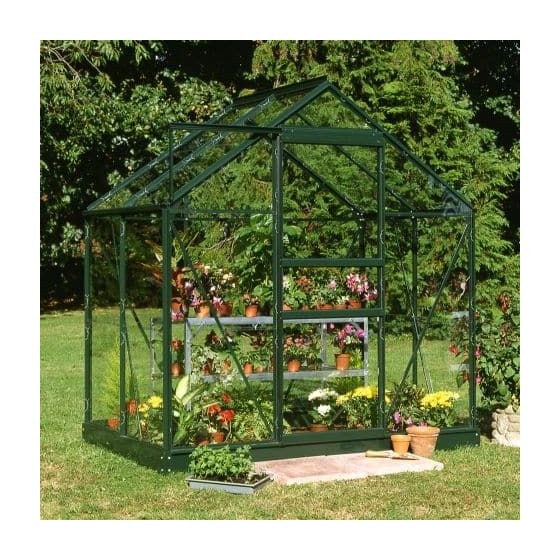
Halls Green Frame 6 × 4 greenhouse
Best for: toughened glass in a compact plot
A traditional-looking 6 × 4 with a green aluminium frame and large panes of toughened glass. It is the clearest fit if you want glass in a small footprint and accept a separate base.
What stands out
- Large-paned toughened glass
- Low-maintenance coated aluminium
- Roof vent and gutters included
Keep in mind
- Matching base costs extra
- Heavy panes need careful assembly
- 1.93 × 1.33m base
- green aluminium
- toughened glass
- optional base

Coppice Ashdown 6 × 6 wooden greenhouse
Best for: a premium full-size timber greenhouse
A full-size oiled and pressure-treated timber greenhouse with a 1.905 × 1.93m footprint, 3mm toughened glass, a 720mm hinged door, two roof vents and two-shelf staging. Professional installation is included in the listed package.
What stands out
- Professional installation included
- 720mm glazed door
- Staging and two roof vents included
Keep in mind
- Premium price level
- Wood requires annual retreatment
- 1.905 × 1.93m footprint
- pressure-treated timber
- 3mm toughened glass
- two roof vents
| Base type | Best for | Advantages | Limitations |
|---|---|---|---|
| Paving slabs | Most domestic kits and clean working space | Level access; repairable; good drainage design | Needs compacted sub-base and accurate laying |
| Concrete slab | Heavy structures and long-term fixed sites | Rigid; durable; straightforward anchoring | Permanent; drainage and level errors are hard to correct |
| Perimeter foundation | Soil beds inside the greenhouse | Supports frame while retaining open ground | Must be square; paths and drainage need separate work |
| Treated timber perimeter | Some light structures and temporary sites | Fast and relatively reversible | Finite life; must stay drained and securely anchored |
| Proprietary metal base | Matching manufacturer systems | Simplifies frame connection and raises door line | Still needs support and approved anchors |
What the base has to achieve
A greenhouse foundation does four jobs: it keeps the frame level, holds it square, transfers wind loads into the ground and manages water around the structure. A surface that merely looks flat is not enough. Small errors can make sliding doors bind, vents sit unevenly and rigid glazing carry stress.
Choose the greenhouse before building the base. Nominal sizes are not construction dimensions, and two products sold as 6 × 4 can have different footprints and anchor positions. Use the latest technical drawing for the exact frame and glazing variant.
See the layers
Foundation, frame base, anchors and water: four separate decisions
These original cross-sections are schematic, not scale drawings or construction specifications. They show what must be resolved for each approach, not a universal layer thickness, fixing pattern, drainage fall or safe soil condition. Use the exact greenhouse manual and competent site advice for dimensions, anchors, load-bearing ground and water disposal.
The slabs and prepared ground support the structure. A proprietary metal base is a separate frame component; it still needs the maker's specified connection and suitable anchoring. Plan water flow beyond the frame and the doorway, not through the threshold.
Confirm the slab size, finished level and anchor design for the actual model before pouring. Fixings must suit the concrete and their locations must respect the manufacturer's pattern; the slab's outer fall or water route must not twist the level frame support.
Support and anchor the frame at its specified points; design the central path, soil level and drainage independently. Keep earth off vulnerable frame members, prevent runoff from crossing a neighbour's land or accumulating by the house, and check whether the chosen kit permits this floor arrangement.
The diagrams separate four questions that a single word like “base” can hide: what bears the load, what connects the frame, what resists wind uplift, and where water goes. Use the detailed paving, concrete, perimeter and anchoring guides for the next decision.
Paving slabs: the best all-round option
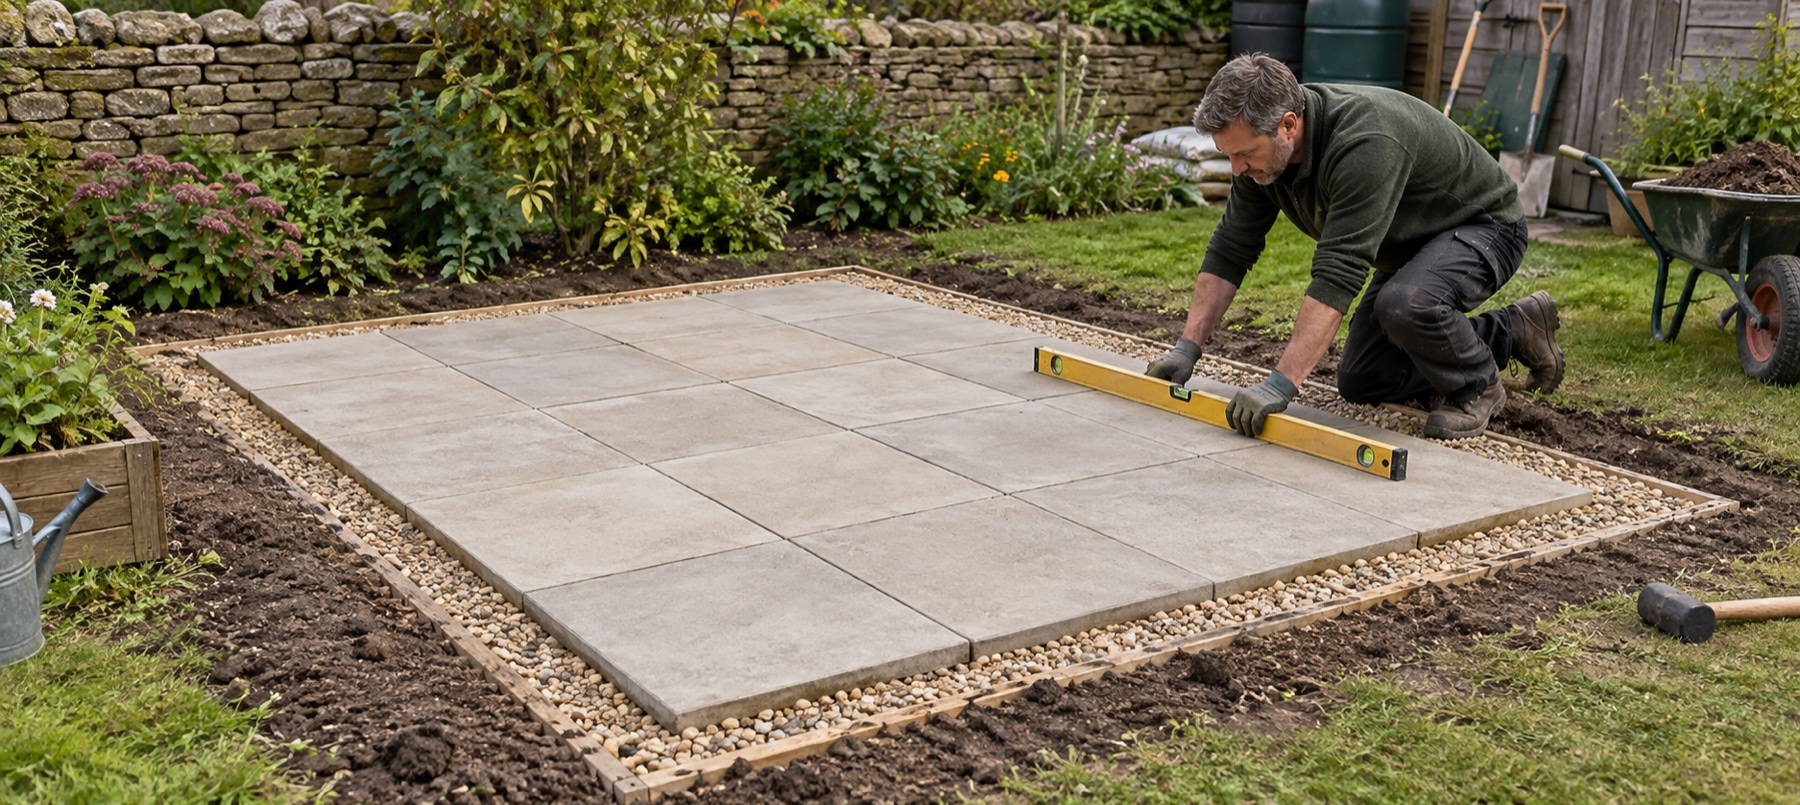
Well-laid slabs create a clean, accessible floor and a stable surface for many aluminium and timber greenhouses. They are easier to lift and correct than concrete, allow local drainage design and can extend outside the door as a practical approach.
Success depends on the layers below. Remove organic topsoil, prepare a compacted sub-base appropriate to the ground and bed the slabs using a suitable method. Spot bedding leaves unsupported corners and voids that can cause movement. Check level across the whole area and both diagonals of the greenhouse footprint.
Plan anchor locations before choosing slab size. Fasteners should not be forced too close to slab edges, and the fixing type must suit the paving and frame.
Concrete slab: rigid but permanent
A reinforced or correctly specified concrete slab gives a heavy greenhouse a stable platform and provides reliable anchor points. It can be useful on difficult ground or where the structure will remain for decades.
Concrete is unforgiving. An out-of-square or sloping slab is expensive to correct, and a fully sealed surface can direct rain to the wrong place. Set finished levels relative to paths, damp-proof courses, drains and neighbouring land. Include any required fall outside the actual frame support without twisting the greenhouse base.
Before pouring, confirm planning, services and the final greenhouse. A generic 6 × 8 slab may not match the product eventually ordered.
Perimeter base for soil beds
A perimeter foundation supports the greenhouse edges while leaving soil inside for deep beds. Brick, block or concrete kerbs can form the ring; some systems use treated timber or a proprietary metal plinth. The ring must be square, level and strong at anchor points.
Open soil inside improves rooting depth but adds questions about drainage, pests, path stability and soil level against the frame. Keep soil below vulnerable timber rails and avoid burying aluminium sections that were not designed for ground contact. Provide a firm central path and a threshold that will not become muddy.
Timber perimeter bases
Pressure-treated sleepers or structural timber can provide a fast, relatively reversible foundation for a light greenhouse. They work best on a well-drained prepared bed with secure ground connections. Timber dimensions must match the frame and remain square during assembly.
Even treated wood has a finite life in persistent damp. Keep vegetation and soil away from its sides, provide drainage and use compatible fasteners. Do not choose timber only to avoid ground preparation; a moving or twisted timber ring will transfer its errors to the glazing.
Proprietary metal bases
Some greenhouses include a galvanised-steel or aluminium perimeter base; others sell one separately. It normally simplifies the connection between frame and foundation and may raise the door or glazing clear of the ground.
It does not float independently. The base still needs the specified ground anchors, bolts or brackets and must sit on an accurately prepared support. Include an optional base in the purchase comparison because the frame manual may assume it when giving dimensions and anchoring details.
Drainage and finished levels
Rain runs from a greenhouse roof in concentrated lines. Fit gutters where available and send overflow to a suitable point. Keep the finished foundation slightly above surrounding soil so surface water does not wash in, but do not create an unnecessary step at the doorway.
Around timber greenhouses, prevent splashback and standing water at the lower rails. Around aluminium frames, keep drainage channels and anchor points visible for inspection. Gravel margins can reduce mud but need edging so loose stones do not enter door tracks.
Anchoring the frame
Anchors are not an accessory for unusually windy gardens. They are part of the structure. Use the manufacturer's pattern and fastener specification for concrete, paving, a perimeter wall or ground anchors. If the foundation material does not suit the approved fixing, change the foundation rather than improvising.
Recheck anchors after the first periods of strong wind and during annual maintenance. Close doors and vents before storms so wind cannot pressurise the interior.
Setting out accurately
Mark the footprint with string and compare the two diagonal measurements; equal diagonals confirm a rectangle is square. Establish one reliable datum for height, then check level along each side and across the centre. Do not measure only the surrounding excavation.
Add working space outside the frame for installation, cleaning and gutters. Confirm the door side and threshold before positioning anchor holes. Photograph measurements and concealed foundation layers for future maintenance.
Which base should you choose?
Choose paving slabs for a versatile, tidy domestic installation with good everyday access. Choose a perimeter foundation if in-ground beds are central to the growing plan. Choose concrete where exceptional rigidity or a heavy permanent structure justifies it. Use a timber or proprietary base only as part of a complete supported and anchored system.
If the garden slopes, drains badly or has unstable made ground, obtain competent site advice before building. The best greenhouse base is the one that remains square and dry on the actual ground—not the quickest surface to install on a calm weekend.
The manufacturer's drawing is the final reference; Halls' base guidance is one example of its level-and-square checks. Follow the dedicated guide for paving slabs, concrete or a perimeter foundation once the support type is chosen.
Common questions
Frequently asked questions
Can a greenhouse sit directly on soil?
Most walk-in greenhouses should not sit directly on uneven soil. The frame needs continuous or specified support, accurate level and secure anchoring. Some systems use ground anchors, but they still require the preparation described by the manufacturer.
Are paving slabs better than concrete for a greenhouse?
Slabs are often easier to drain, repair and remove, while a well-made concrete slab is more rigid and permanent. Either can work if it is correctly sized, level, square and compatible with the chosen anchors.
Does a metal greenhouse base replace a foundation?
No. A proprietary metal base usually connects the frame to the site and raises it above the surface, but it still needs a stable level support and the specified anchors into paving, concrete or ground.
How level must a greenhouse base be?
Level enough that the complete frame remains square and doors, vents and glazing fit without force. Check the manufacturer's tolerances, measure both diagonals and correct the foundation rather than twisting the greenhouse to match it.
Should a greenhouse base be larger than the frame?
Follow the technical drawing. A full paved or concrete working area may extend beyond the frame for clean access, but the supporting and anchor positions must match the exact base dimensions and must not create a lip that sends water under timber.