
Greenhouse foundations
Greenhouse paving-slab base guide
Build a level, stable greenhouse base with paving slabs, including excavation, sub-base, falls, joints, anchoring and common mistakes.
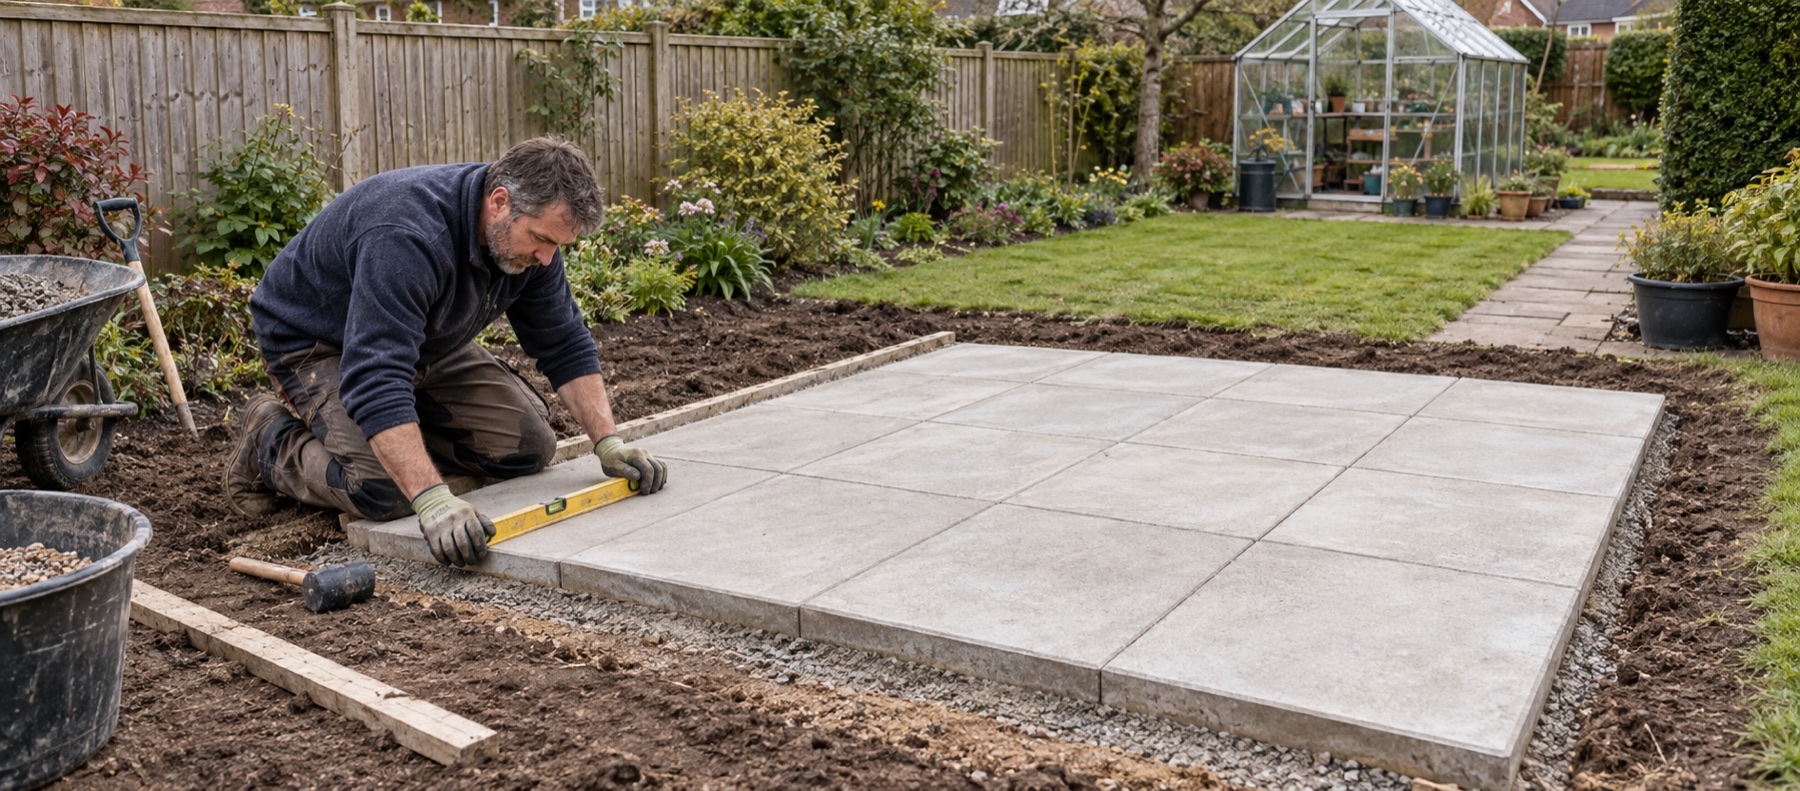
Use the manufacturer’s base dimensions, not the nominal greenhouse size.
Excavate soft ground and compact the sub-base in layers before laying slabs.
Keep the frame footprint level; manage rain around the base instead of tilting the greenhouse.
Plan anchor positions before laying so fixings do not land on slab edges or joints.
Why paving slabs work well under a greenhouse
A correctly built slab base gives a greenhouse three useful things at once: a flat assembly surface, clean all-weather access and a foundation that can accept suitable anchors. It also makes sweeping, pest control and moving pots easier than bare soil.
The slabs are only the visible layer. Stability comes from firm ground, a compacted granular sub-base and consistent bedding below every slab. If those layers are omitted, individual slabs can rock or sink. A greenhouse frame then racks out of square, doors bind and glazing retainers carry loads they were not designed to take.
Start with the exact frame dimensions
“6 × 8” is a size class, not a cutting plan. Obtain the base diagram from the exact model and note:
- the outside dimensions of the base rail;
- any corner projections, downpipes or door ramps;
- where anchors can pass through the rail;
- the space needed to assemble and clean the outside;
- whether a proprietary steel or timber perimeter base is required.
Mark the finished slab area with string and measure both diagonals. Equal diagonals confirm a rectangle is square. Check the delivery and assembly route before excavating: a base tucked tightly against a fence may be impossible to glaze safely.
Decide the finished height
The top surface should sit high enough that surrounding soil cannot wash onto it, but not so high that the doorway becomes an awkward step. Consider the finished level of paths, lawns and nearby borders as well as the excavation depth.
Keep surface water moving away from the greenhouse perimeter with surrounding drainage, a narrow gravel strip or an appropriately graded approach. Do not solve drainage by building a noticeable fall through the greenhouse footprint. The frame needs a level plane.
Excavate to firm ground
Remove turf, roots and organic topsoil across the full area. Excavation depth depends on ground conditions, slab thickness, bedding and intended sub-base; there is no responsible universal number. Soft, recently disturbed or poorly drained ground may need more preparation than firm undisturbed soil.
If the excavation exposes persistent water, very soft material, major tree roots or made ground, pause. A local landscaper or groundworker can specify a foundation for those conditions. Simply adding more dry aggregate above unstable material does not remove the cause of movement.
Install and compact the sub-base
A well-graded granular sub-base spreads the load and limits local settlement. Lay it in manageable layers and compact each layer with appropriate equipment. The finished sub-base should feel firm underfoot, maintain the planned depth across the whole pad and extend beyond the slab edges.
Geotextile separation can be useful where fine subsoil would migrate into the aggregate, but it does not replace excavation or compaction. Keep underground electricity, water or drainage routes out of the excavation unless they have been deliberately designed and protected.
Bed every slab consistently
Use a full, even bedding method appropriate to the slabs and local conditions. Five isolated mortar spots leave unsupported voids and allow the slab to crack or rock. Work from a straight reference edge and check level in both directions as each slab is placed.
Use a long straightedge as well as a short spirit level. A short level can show each slab as individually flat while missing a gradual rise through the whole base. Check across joints and corner to corner, and lift and re-bed a slab that rocks rather than trying to stabilise it later with the greenhouse fastener.
Keep joints consistent and finish them with a system compatible with the paving and bedding. Loose jointing material should not be able to wash into the greenhouse threshold or prevent the base rail sitting flat.
Plan the threshold and growing area
A fully paved interior is clean and flexible for staging, pots and growbags. If you want soil beds inside, a paved perimeter with defined openings may be more appropriate—but the perimeter still has to carry the frame continuously and resist anchor loads.
At the doorway, preserve the opening height stated in the manual. A later path laid above the slab can block a sliding door or create a trip edge. If step-free access matters, design the approach and threshold together before the base is built.
Anchor without damaging the slabs
Let mortar and jointing materials cure as specified before drilling. Position the assembled base accurately, confirm it is square, and mark fixing holes through the approved anchor points. Avoid slab edges, corners and joints, where an expanding fixing can cause a break.
Use the anchor type, diameter, embedment and washers specified by the greenhouse or base manufacturer. Drill straight with the correct masonry bit, remove dust from the hole and tighten to the stated torque. Overtightening can deform a thin aluminium base rail or split a slab.
For exposed gardens or unusually light structures, the paving and anchor design may need professional assessment. Anchoring a frame to a small loose slab does not necessarily provide meaningful resistance to wind uplift.
Check the base before assembly
After curing, make four checks:
- The slab field is square and matches the required overall dimensions.
- A long straightedge finds no rocking slabs, steps or pronounced fall.
- Water cannot pool against the intended base rail or doorway.
- Proposed anchors have adequate sound material around every hole.
Photograph the empty base and keep the measurements with the greenhouse manual. If a door begins to bind later, those records help distinguish base movement from a frame adjustment.
Common paving-base mistakes
The expensive failures are usually ordinary: using nominal rather than actual dimensions, laying on topsoil, compacting only the surface, supporting slabs on mortar dabs, forgetting the door approach and drilling too close to an edge. Another common error is building the exact frame footprint with no working margin, then discovering that the installer cannot reach the glazing clips on the fence side.
If paving is not the best match for the site, compare concrete, perimeter and ground-anchor options in our best greenhouse base guide. Once the foundation is ready, use the greenhouse anchoring guide to connect the structure correctly.
Final checklist
Confirm exact dimensions, finished height, excavation, compacted sub-base, full bedding, level across the whole pad, drainage around the perimeter, safe access and approved anchor positions. A neat slab surface is not enough; the greenhouse relies on every layer beneath it staying still.
The Halls guidance on establishing a base is a manufacturer example of the alignment checks. Follow your own frame's base drawing and approved anchoring method, rather than selecting a paving pattern first and forcing the greenhouse to fit it.
Helpful products
Measure and check the base
Use a tape for the exact frame footprint and diagonals, then a long level to check the slab plane as you work. Neither replaces the model's base drawing or a properly prepared sub-base.

Stanley Tylon 5m tape measure
Best for: site and footprint measurements
A five-metre metric-and-imperial tape for recording a proposed footprint, boundary clearance and base dimensions. Take multiple readings; a tape alone cannot resolve a planning interpretation.
What stands out
- Practical for small and medium greenhouse plots
- Clear footprint measurements
- Useful for checking clearances
Keep in mind
- Does not measure height safely without appropriate access
- Check the live listing's pack quantity before buying
- 5m blade
- 19mm blade width
- metric and imperial markings
- selected Amazon listing is one tape

Stabila Type 70-2 120cm spirit level
Best for: long base-level checks
A 120cm aluminium spirit level with horizontal and vertical vials for checking a straight base run and the frame's position. It cannot prove a foundation is structurally sound.
What stands out
- Spans more than one small slab
- Useful before fixing a base rail
- Can be reused for other garden projects
Keep in mind
- A level reading does not establish load capacity
- Ground-height questions for planning may need professional measurement
- 120cm selected variant
- one horizontal vial
- two vertical vials
- aluminium profile
Common questions
Frequently asked questions
Are paving slabs suitable for a greenhouse base?
Yes. Properly supported slabs create a durable, clean and anchorable surface. The important detail is what sits below them. Slabs laid on topsoil or isolated dabs of mortar can settle independently and twist the frame.
Does a greenhouse slab base need to be perfectly level?
The frame footprint should be level and in one plane within the tolerances in the installation manual. A small difference that seems harmless at ground level can stop doors aligning and glazing fitting correctly.
How much larger should the slab base be than the greenhouse?
Follow the manufacturer’s overall base and anchoring dimensions, then add enough margin for drill holes, assembly and safe access. A narrow margin risks fixings breaking the slab edge; an excessively large paved apron increases cost and runoff.
Can I put paving slabs directly on soil?
No. Organic topsoil moves, holds water and compresses unevenly. Remove it to firm ground, install a suitable compacted granular sub-base and bed the slabs consistently.
Can the greenhouse be screwed into paving slabs?
Often, provided the greenhouse manual allows it, the slab is sound and the approved fixing stays well away from edges and joints. The anchor must connect the structural base rail to the foundation, not merely hold a decorative trim.