
Small-greenhouse organisation
How to organise a small greenhouse
Organise a compact greenhouse with a clear aisle, seasonal shelving, vertical growing, labelled storage and simple crop and watering zones.
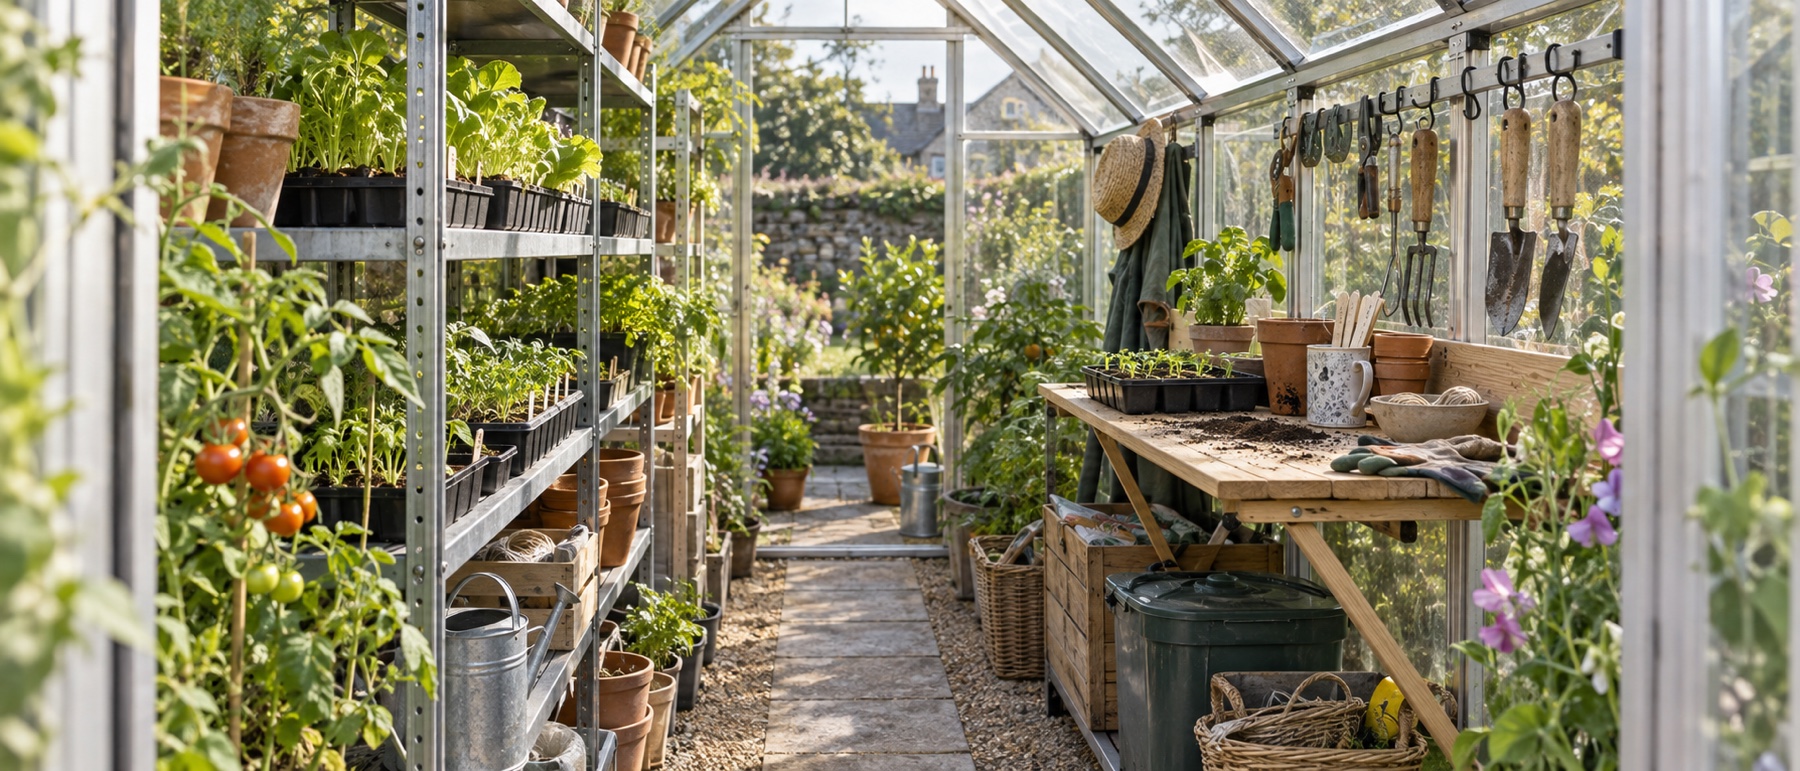
Remove duplicates, empty packaging and supplies used elsewhere in the garden.
Keep dense compost, water and large pots low and close to their point of use.
Use walls and frame only with manufacturer-approved hooks or accessories.
Reset the greenhouse at least at the spring-to-summer and autumn changeovers.
Empty it before you optimise it
Take out every movable item on a mild, dry, calm day. Group it into active growing equipment, seasonal supplies, duplicates, waste and items that belong in a shed or home. Small greenhouses feel crowded because they accumulate storage unrelated to the crop.
Return only what supports the current season. Bulk compost, spare canes, unused pots and unopened irrigation parts usually belong elsewhere. The greenhouse should not become the default store for paint, fuel, pesticides or household chemicals.
Protect the working aisle
Mark the path from the door to the far end and keep it free of pots, watering cans and hose loops. Test it while carrying a full seed tray. Foliage will reduce the usable width later, so include a margin around summer crops.
The surface should be firm, level and drained. Loose objects on a wet path create trips, while algae can make hard paving slippery. Store the watering can beneath a shelf or outside, never in the threshold.
Choose shallow storage over deep cupboards
Closed cupboards consume light and hide damp. A 25–35cm-deep open shelf can hold standard seed trays while preserving a narrow aisle. Put everyday items between knee and shoulder height and reserve the lowest level for heavier pots.
Do not fill every shelf because it exists. Leave enough vertical clearance for air and plant growth. If a tray cannot be removed without tipping the one above, the spacing is too tight.
Give the entrance a landing zone
Use a small caddy or shallow tray near the door for secateurs, labels, pencil, ties and gloves. This prevents tools migrating across the potting surface. A hook system is useful only when it fits the manufacturer's glazing-bar channels; never drill or overload a light aluminium member.
Keep one empty patch of bench large enough for the biggest routine task. If it constantly fills with storage, assign every stored item another home before adding a second worktop.
Grow up, but use independent supports
Tomatoes, cucumbers and climbing beans can use the upper volume, but a crop becomes heavy when wet and laden with fruit. Use purpose-made free-standing frames or greenhouse-manufacturer crop bars and wires. Do not tie crops to automatic vent arms, panes, glazing clips or an unknown roof member.
Train and prune little and often so stems do not cross the aisle. Put taller plants where they will not shade propagation trays that still need strong light.
Create four simple zones
Propagation
Use the brightest suitable shelves for seed trays and young plants. Keep labels readable from the aisle and avoid placing clean seedlings below plants that regularly drip.
Main crops
Group large pots, growbags or a border along one side. Similar water demand makes irrigation easier and reduces the temptation to run tubes in every direction.
Work
Keep one wipe-clean surface for sowing, potting and harvest preparation. Put a small waste tub underneath so diseased leaves leave the greenhouse promptly.
Supplies
Use one low, lidded container for current compost and one washable crate for clean pots and trays. Stop when those containers are full; overflow belongs elsewhere.
Label positions, not every possession
Simple labels such as “current sowings”, “clean pots” and “irrigation spares” are more durable than a complicated inventory. Use waterproof labels and return the container to the same place. Keep seed packets and paper records in a drier indoor location.
A small greenhouse benefits from a one-in, one-out rule for trays and pots. Discard cracked brittle plastic that cannot be cleaned or used safely, following local recycling guidance.
Keep heavy and wet items low
Water, saturated compost and ceramic pots are heavy. Store them on the floor or the lowest rated shelf, distributed evenly. Never put a full watering can overhead. Check the shelf manufacturer's limit using the wet weight, not the dry product label.
Keep electrical equipment and connections away from irrigation and floor puddles. Any permanent greenhouse supply should be professionally planned with suitable protection for the environment.
Build a simple watering route
Run one main line along the back of the plant zone, then use short branches. Keep shut-off points reachable and add labels if there is more than one zone. Tubing should not cross the threshold or become the only thing holding a shelving unit in place.
Where hand-watering, move the can along the path rather than reaching over multiple shelves. Watering from the aisle is safer and makes it easier to see drainage and pests.
Use a seasonal layout
In spring, shelving holds trays and modules. Once plants move outside, remove or collapse at least one unit and clean it. Summer fruiting crops then gain air and vertical space. In autumn, clear exhausted crops before bringing tender plants in; do not simply stack them around the old layout.
Photograph each successful seasonal arrangement and note which shelf moved. Next year, rebuild the useful version instead of starting with the cluttered end-of-season state.
The ten-minute weekly reset
Put tools in the caddy, remove empty pots, sweep soil from the aisle, empty standing water, tie in new growth and check that vents still move. Inspect beneath the lowest shelf for slugs, fallen leaves and algae. A short regular reset prevents the large clear-out that delays important crop work.
Sources and related guides
The RHS greenhouse-cleaning guide recommends removing equipment, clearing debris and cleaning staging as part of a healthy greenhouse routine. See our practical greenhouse layouts, best greenhouse staging and 6 × 4 greenhouse guide for connected planning decisions.
Helpful products
Shallow shelving for compact spaces
These light-duty pairs prioritise tray capacity and narrow depth. Measure the live product dimensions and load from the bottom upwards.

VonHaus four-tier greenhouse shelving, pack of two
Best for: high-capacity tray storage
Two slim powder-coated steel units, each with four open shelves. The pair offers eight tray levels without taking the depth of a full potting bench.
What stands out
- Eight shelf levels in the pair
- Shallow 30.5cm depth
- No-tool push-fit assembly
Keep in mind
- Not a comfortable potting height or solid worktop
- Lightweight units should be loaded evenly and secured if required
- two shelving units
- 90 × 30.5 × 107.5cm each
- four shelves each
- 8kg stated capacity per shelf

Oypla four-tier greenhouse staging, double pack
Best for: lightweight seasonal shelving
A lightweight double pack of four-tier racks for seed trays, small pots and seasonal propagation. The narrow shelves provide useful capacity when a permanent heavy bench would be excessive.
What stands out
- Two movable units
- Narrow shelf depth
- Many levels for light trays
Keep in mind
- Numerical load capacity is unconfirmed
- Manual specifies indoor use; confirm greenhouse conditions
- double pack
- about 91 × 28 × 105.5cm each
- four tiers each
- powder-coated steel-tube frame
Common questions
Frequently asked questions
How do I maximise space in a 6 × 4 greenhouse?
Use one shallow shelf run, keep the other side low for pots or a narrow bed, grow suitable crops vertically and remove propagation shelving once summer crops expand. Protect the aisle before adding storage.
Can I hang tools from a greenhouse frame?
Only use the greenhouse manufacturer's compatible channels, bolts or accessories. Do not drill light glazing bars or load vent mechanisms. A freestanding entrance caddy is safer when frame compatibility is unknown.
What should be stored under greenhouse staging?
Stable, moisture-tolerant items such as clean pots, trays and a sealed compost container can go below. Keep heavy items low, but do not block airflow, create pest hiding places or store chemicals beneath irrigation.
How can I organise lots of seed packets and labels?
Keep seed packets indoors in a cool, dry place unless their packaging specifies otherwise. In the greenhouse, use one lidded caddy for current labels, pencil, ties and small tools so the work surface can be cleared quickly.
How often should I reorganise a greenhouse?
Make small weekly resets and two major seasonal changes: after spring propagation and after summer crops finish. Each change is an opportunity to clean hidden surfaces and inspect the frame.