
Secure installation
How to anchor a greenhouse
Anchor a greenhouse to concrete, paving, timber or soil by following the structural load path, manufacturer fixings and site exposure.
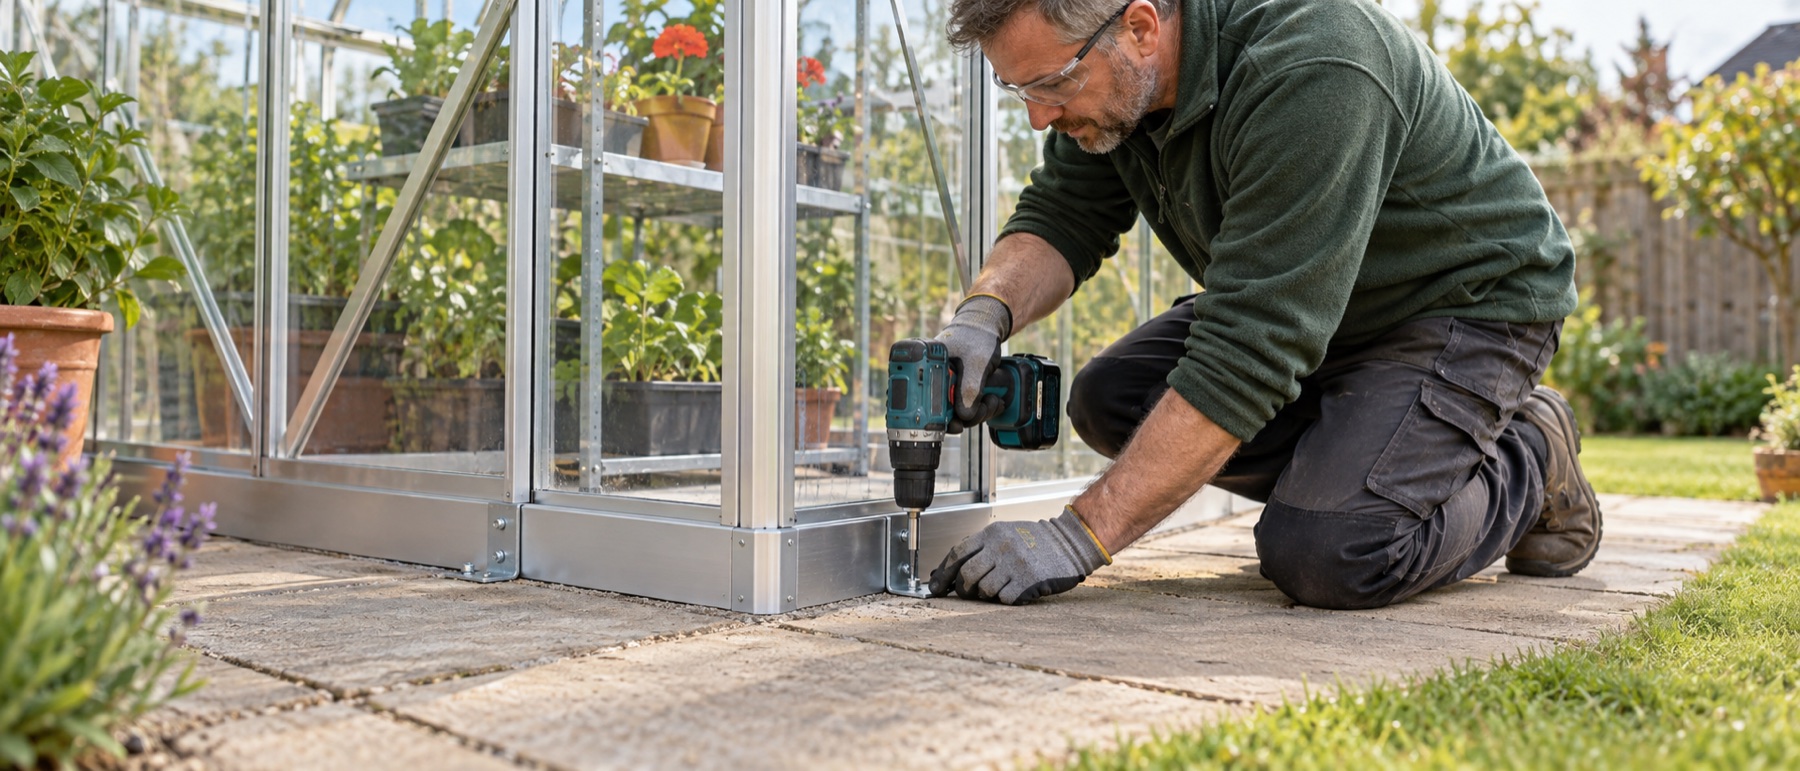
Follow the greenhouse and proprietary-base instructions before choosing a fixing.
Anchor the structural rail or bracket, never a thin glazing bar or decorative trim.
Match the fastener to the foundation and keep masonry holes away from edges and joints.
Recheck doors, vents, panels and anchors after assembly and severe weather.
Why anchoring is a structural job
A greenhouse is light for its surface area. Wind pushes on the walls, pulls at the leeward roof and finds leverage through an open door or vent. The response must travel through the frame, base rail, brackets and anchors into a foundation or stable ground.
One strong bolt cannot compensate for missing connections elsewhere. Equally, dozens of small screws through thin aluminium are not automatically safer than the approved number of correctly placed anchors. Start with the assembly manual for the exact model and identify the intended load-bearing base components.
Build the foundation first
Anchors preserve alignment; they do not create it. Set the foundation level, flat and square before the frame is fixed. If the base rail rocks, packers inserted at random points can concentrate loads and distort the structure.
Confirm that concrete has cured, slabs are fully bedded, timber is structurally sound and ground anchors sit in firm soil. Check for buried cables, pipes and drains before drilling or driving anything below the surface.
Anchor to concrete
Concrete provides a continuous fixing surface when it is sound and thick enough for the approved anchor. Assemble or position the base, check both diagonals, then mark only the specified holes. Move the frame aside if the drilling method could damage it.
Use a masonry bit and fastener compatible with the bracket, concrete and exposure. Clean dust from holes so anchors can seat correctly. Fit washers where specified and tighten evenly around the perimeter, checking that the base remains square. Do not keep tightening a fastener that spins or fails to grip; investigate the hole and use an approved repair.
Maintain the manufacturer’s edge distance. A hole close to the slab perimeter can break out under expansion or uplift even when the bolt initially feels tight.
Anchor to paving slabs
The fixing is only as dependable as the slab and its bedding. Full slabs on a compacted base and full mortar bed are much more useful than loose flags sitting on sand or soil. Keep every hole well inside the slab and away from joints.
Where possible, plan the paving layout so each bracket lands near the body of a slab. If the greenhouse base hole falls on a joint, change the paving design or use a manufacturer-approved bracket position rather than drilling diagonally through the rail.
Our paving-slab base guide covers the supporting layers and level checks in detail.
Anchor to a timber perimeter
A treated timber perimeter can provide height and a convenient fixing surface, but the timber itself must be fixed to the ground or foundation. Screwing a greenhouse to a loose rectangle of timber simply joins two movable objects.
Use the section and durability class specified for the system. Keep the timber square, support it continuously where required and isolate vulnerable end grain from standing water. Structural screws need adequate length and edge distance without protruding into the doorway or glazing channels.
Inspect timber annually for decay, splitting and loose connections. A sound-looking upper surface can conceal soft material around a fastener.
Anchor on soil
Ground-based installations normally use a proprietary steel base with legs or separate anchors driven or concreted into firm ground. Follow the specified depth, spacing and orientation. The metal base must be connected to both the anchors and the greenhouse frame.
Soil varies enormously. Sandy ground, saturated clay, peat, recent fill and exposed coastal sites can all reduce the reliability of a standard detail. If an anchor does not develop a firm hold or the site is notably exposed, ask the greenhouse manufacturer or a competent local installer for a site-specific approach.
Do not bury untreated timber or ordinary frame members as improvised anchors. Corrosion and decay occur out of sight, exactly where the system needs dependable resistance.
Lean-to greenhouse anchoring
A lean-to usually needs two separate connections: the base to the foundation and the high side to a suitable wall. The wall fixing is not a substitute for the foundation, and a garden fence is rarely an appropriate structural support.
Identify the wall material behind render or cladding, avoid damp-proof courses and services, and use the mounting system specified by the manufacturer. Uneven walls may require a designed packer or flashing detail rather than forcing the frame to follow the masonry.
Keep the frame square while tightening
Loosely assemble the frame, check the base dimensions and compare diagonals before fully tightening. Recheck after glazing because panel weight and frame adjustments can move the structure. Doors should slide or swing without lifting, and vents should close evenly.
Tighten anchors progressively around the perimeter. Pulling one corner down hard before the others are seated can introduce a twist. Thin aluminium should remain flat beneath the washer or bracket; deformation is a warning that the detail or torque is wrong.
Prepare for severe weather
Before high winds, close and latch doors, vents and louvres. Remove loose staging, pots and tools from around the structure. Check panel clips, capping bars and any damaged seals because wind entering through an opening can increase internal pressure.
Inspect the base after a storm for lifted brackets, cracked slabs, elongated holes, loose nuts and new door misalignment. Do not work beside broken or unstable glazing in strong wind. Make the area safe and use a competent repairer where necessary.
What not to do
Do not rely on sandbags, guy ropes over glazing, a few screws into a loose timber frame or sealant as structural restraint. Do not drill unknown buried services, fasten through a glazing channel or add holes to a member without approval. An improvised restraint can transfer load into the most fragile part of the greenhouse.
Final anchoring check
Confirm the foundation, approved fixing points, fastener material, hole depth, edge distances and tightening instructions. Verify the frame is square, every door and vent operates, and the connection can be visually inspected later. A good anchor is not dramatic: it is a complete, maintainable path from frame to firm ground.
A model-specific example is the Canopia Hybrid foundation and fixing guidance. It is not a generic anchor schedule for other frames. Check the paving-base guide or perimeter-base guide if the supporting surface itself is the weak part of the load path.
Helpful products
Check alignment before fixing
These are measuring tools, not anchors. Measure the frame diagonals and check that the foundation is level before installing only the fixings approved for your greenhouse and base.

Stanley Tylon 5m tape measure
Best for: site and footprint measurements
A five-metre metric-and-imperial tape for recording a proposed footprint, boundary clearance and base dimensions. Take multiple readings; a tape alone cannot resolve a planning interpretation.
What stands out
- Practical for small and medium greenhouse plots
- Clear footprint measurements
- Useful for checking clearances
Keep in mind
- Does not measure height safely without appropriate access
- Check the live listing's pack quantity before buying
- 5m blade
- 19mm blade width
- metric and imperial markings
- selected Amazon listing is one tape

Stabila Type 70-2 120cm spirit level
Best for: long base-level checks
A 120cm aluminium spirit level with horizontal and vertical vials for checking a straight base run and the frame's position. It cannot prove a foundation is structurally sound.
What stands out
- Spans more than one small slab
- Useful before fixing a base rail
- Can be reused for other garden projects
Keep in mind
- A level reading does not establish load capacity
- Ground-height questions for planning may need professional measurement
- 120cm selected variant
- one horizontal vial
- two vertical vials
- aluminium profile
Common questions
Frequently asked questions
Does every greenhouse need anchoring?
A freestanding greenhouse should be secured by the method specified for its model and foundation. Its large glazed surface can experience substantial wind forces even when the structure feels heavy in calm weather.
Can I anchor a greenhouse to paving slabs?
Often yes, if the slabs are full-size, sound and properly bedded and the fixing position has enough distance from edges and joints. Small loose flags or poorly supported slabs may lift with the greenhouse rather than restrain it.
How do I anchor a greenhouse on soil?
Use the manufacturer’s ground-base or anchor system installed to its required depth and orientation. Soft, waterlogged, recently filled or very exposed sites may need a designed foundation instead of generic stakes.
Are greenhouse weights or sandbags enough?
They are not a reliable substitute for the model’s specified permanent anchoring. Loose weights can move, do not create a defined structural connection and may become hazards in severe weather.
Should I add extra screws in a windy garden?
Not without manufacturer approval. Drilling extra holes can weaken members, damage coatings or miss the load-bearing part of the base. Improve the approved foundation and connections rather than improvising on glazing bars.