
Patio greenhouse guide
Best greenhouses for patios
Compare patio greenhouses by footprint, door and lid clearance, height, glazing, ventilation and access, with options for trays, pots and walk-in growing.
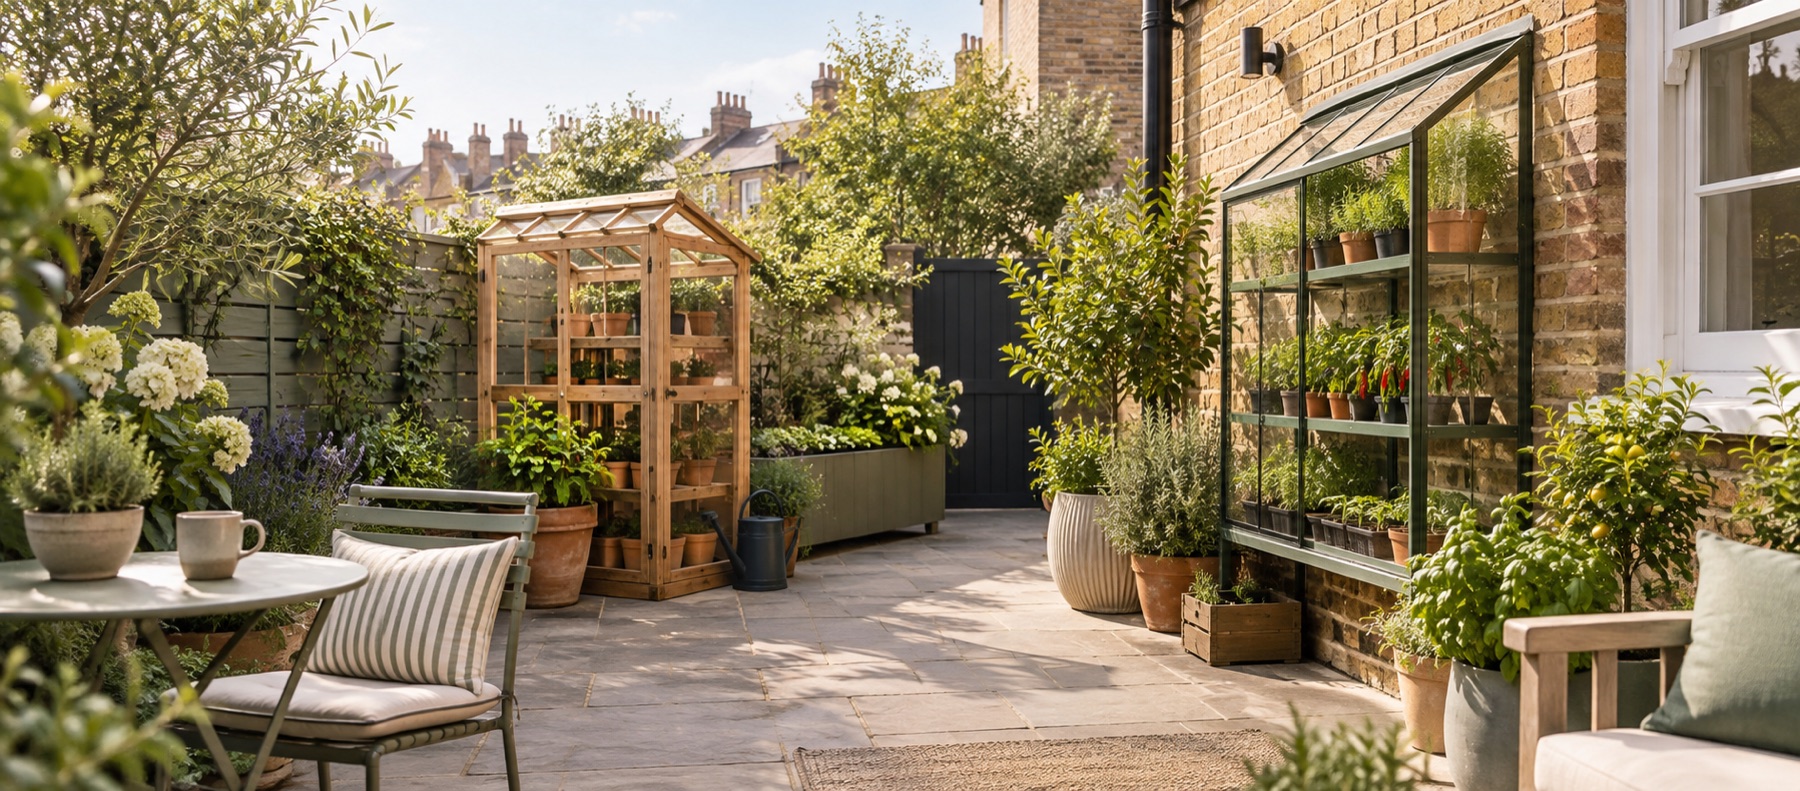
Our recommendations
Patio greenhouse options by layout
These choices show the trade-off between a shallow cabinet, vertical shelving and true walk-in access.
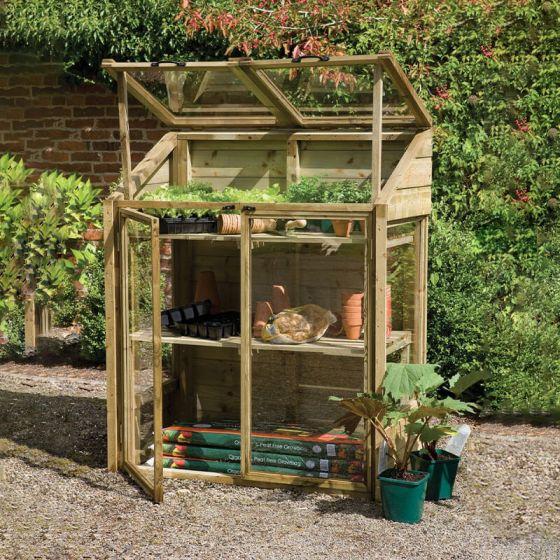
Forest Wooden Mini 4 × 2 growhouse
Best for: the smallest fixed footprint
A 1.2m-wide timber growhouse with two front doors, two independently opening glazed lids and two internal shelves. It trades walk-in access for a genuinely shallow 0.62m footprint.
What stands out
- Very shallow footprint
- Shelves and growbag-level space
- Independent lids for flexible access
Keep in mind
- Not walk-in
- Capacity falls quickly as plants grow tall
- 1.20 × 0.62m
- pressure-treated timber
- two shelves
- split lid

Forest Victorian 5 × 2 tall wall greenhouse
Best for: vertical growing space on a shallow patio
A 1.47 × 0.72m tall timber greenhouse with a back panel, double doors, adjustable shelving, two roof vents and one automatic vent opener. It uses height rather than garden depth.
What stands out
- Shallow footprint with full-height storage
- Adjustable and folding shelves
- One automatic vent opener included
Keep in mind
- Not walk-in
- Supplied unpainted
- 1.47 × 0.72m base
- pressure-treated timber
- styrene glazing
- two roof vents

Forest Wallscape 4 × 4 lean-to greenhouse
Best for: a compact timber lean-to
A timber walk-in lean-to with a 1.18 × 1.24m base, acrylic glazing, single door and large opening roof vent. Its open back is designed to sit against a suitable wall or fence.
What stands out
- Walk-in space within a short footprint
- Large opening roof vent
- Door can be fitted at either end
Keep in mind
- Needs a suitable supporting surface
- No floor is included
- 1.18 × 1.24m base
- pressure-treated timber
- acrylic glazing
- open back
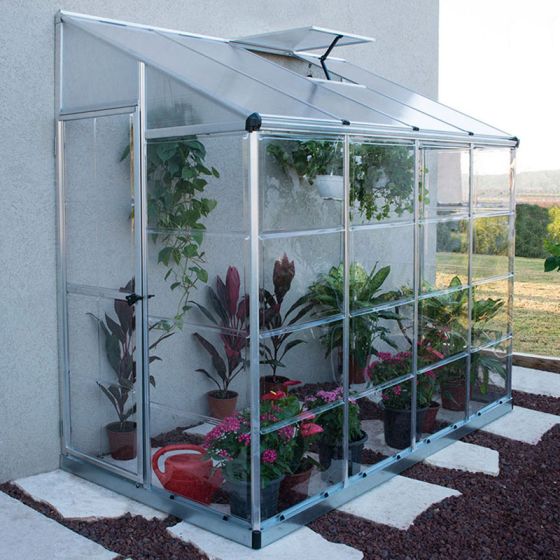
Palram Hybrid Lean-To 8 × 4 greenhouse
Best for: a long, narrow wall-side plot
A long, shallow walk-in lean-to with a side door, diffusing twin-wall roof and clear side panels. It turns roughly 1.25m of projection into a useful 2.44m run against a suitable wall.
What stands out
- Makes use of wall length
- Side door suits the narrow layout
- Perimeter base and wall kit included
Keep in mind
- Needs a suitable wall
- 1.21m width limits two-sided staging
- 2.44 × 1.25m overall
- lean-to
- polycarbonate
- wall-mount kit
| Option | Closed footprint | Walk-in | Moving parts | Best use |
|---|---|---|---|---|
| Forest Wooden Mini 4 × 2 | 1.20 × 0.62m | No | Front doors and top lids | Trays and compact pots |
| Forest Victorian 5 × 2 | 1.47 × 0.72m base | No | Double doors and roof vents | Vertical shelving |
| Forest Wallscape 4 × 4 | 1.18 × 1.24m base | Yes | Single end door and roof vent | Compact standing access |
| Palram Hybrid Lean-To 8 × 4 | 2.44 × 1.25m overall | Yes | Side door and roof vent | Long wall-side growing run |
Start with the patio, not the greenhouse
A patio may be the brightest and most convenient growing area, but it also carries people, furniture, bins and routes to the house. The best greenhouse should improve the space without turning routine movement into an obstacle course.
Sketch the patio to scale. Mark house doors, opening windows, drains, downpipes, steps, utility covers and the main route to the garden. Then add the greenhouse footprint and every moving door, lid and vent. A compact model can demand almost twice its closed depth while you are using it.
Four useful patio formats
Low timber growhouse
The Forest Wooden Mini 4 × 2 uses only 0.62m of depth and gives front and top access to two shelves and lower growing space. It is well suited to seed trays and small pots near the house. Because the lids lift, check the wall, sill and eaves above it.
Tall wall greenhouse
The Forest Victorian 5 × 2 extends capacity vertically within a 0.72m base depth. Adjustable shelving and double doors create a flexible growing cabinet, and this version includes an automatic opener for one of its two roof vents. Preserve a clear standing width across the whole front.
Compact walk-in lean-to
The Forest Wallscape 4 × 4 adds a standing aisle without reaching the footprint of a conventional 6ft-wide greenhouse. The open back needs a suitable wall or approved support, and the end door must meet an unobstructed approach.
Long aluminium lean-to
The Palram 8 × 4 uses 2.44m of wall length and about 1.25m of projection. It can turn an unused side strip into a productive walk-in, but it is a permanent intervention in the patio layout. Check the side-door position, wall fixings and rainwater management before committing.
Check the paving as a foundation
Patio slabs are not automatically a greenhouse base. A slab can look flat while rocking on a weak bed, and the overall patio can drain through a fall that is too great for the frame. Place a long level across the proposed footprint, inspect the joints and understand what lies below.
Use only anchors and fixing methods compatible with the greenhouse and paving construction. Drilling too close to a slab edge can break it. Where the base cannot be anchored reliably, the solution may require lifting and rebuilding a defined area rather than adding improvised weight inside the greenhouse.
Preserve doors, windows and services
Keep clear of boiler flues, air bricks, external taps, sockets, cable routes and drain access. Do not make a house window impossible to clean or open. A greenhouse should not narrow a required escape route or hide a damp-prone wall that needs inspection.
For lean-tos, assess the wall construction and ownership. Render, cladding and external insulation can make ordinary masonry fixings unsuitable. If the patio meets a boundary wall or fence, confirm that you have authority to attach anything and that the surface can carry the loads.
Manage reflected heat
Brick walls and paving can absorb sunlight and release heat after the air cools. That can help in mild weather but produce very high temperatures on clear summer days. Small greenhouses are particularly responsive because their air volume is limited.
Keep vents, lids and doors able to open fully. Place a thermometer at plant height away from direct sun. Automatic openers help when correctly fitted, but the structure still needs a route for cooler replacement air. Removable shade may be useful on the hottest aspect after ventilation has been improved.
Keep watering tidy
Choose a position close enough to water without dragging a hose across the main route. Trays can control small spills, but persistent standing water encourages algae and makes paving slippery. If the greenhouse has gutters, route the outlet deliberately rather than allowing it to discharge beside the base or house wall.
Micro-irrigation can suit grouped pots, but it needs a compatible water supply and regular inspection. On a patio, one loose connector can create both wasted water and a slip hazard.
Make the greenhouse part of the patio
Place the structure along an edge and use the remaining open area as one flexible zone rather than several narrow gaps. Repeat nearby materials or colours without painting glazing or blocking ventilation. Keep compost, tools and empty pots in closed storage so the greenhouse does not turn the patio into a permanent workbench.
If the patio must also support seating, mock up the greenhouse with boxes or tape and use the space for a weekend. Open the house door, carry a tray, move a chair and reach the tap. That simple trial reveals conflicts a plan can miss.
For smaller shelf-based options, use the mini greenhouse buying guide. If a compact freestanding model might fit better, compare 6 × 4 greenhouses.
For independent format guidance, consult the RHS greenhouse-selection overview. Use our patio-installation guide before treating existing paving as a ready-made foundation.
Common questions
Frequently asked questions
Can I put a greenhouse directly on patio slabs?
Only when the slabs and sub-base are firm, level and suitable for the manufacturer's anchoring method. Check for rocking, uneven joints and drainage, and use the exact base dimensions for the chosen model.
What is the smallest useful patio greenhouse?
A shallow growhouse around 4 × 2 can be highly useful for trays, herbs and compact pots. The better measure is usable shelf area and access rather than the smallest exterior footprint.
Will a patio greenhouse get too hot?
It can, especially beside a sun-warmed wall or reflective paving. Choose opening vents or lids, leave them unobstructed, monitor temperature and add removable shade only when ventilation is not enough.
Can a greenhouse block a house window?
It should not obstruct required light, ventilation, escape, maintenance or access to services. Check the whole elevation, including opening windows, vents, flues, downpipes and eaves, before choosing the position.
How do I keep a patio usable around a greenhouse?
Draw the greenhouse with all doors and lids open, preserve the main walking route and keep a standing zone for watering. A shallow design on one edge usually protects more flexible patio space than placing a walk-in in the middle.